Integration Configuration
Purpose/Overview
In this article, you will learn how to create, configure, modify, and delete an API integration. You will also learn how to review API documentation, manage API keys and methods, and view an integration’s change history.
The Integration feature allows you to create RESTful application programming interfaces, or APIs. An integration creates a real-time connection between your application and an Irth system.
APIs use methods to load data from multiple applications. You can select the methods available for the integration and for each associated form.
To manually load data from a Microsoft Excel or CSV file, see Data Sources.
Navigation Path:
To access this feature, go to:
System Management > Administration > Work Management > Integration Configuration
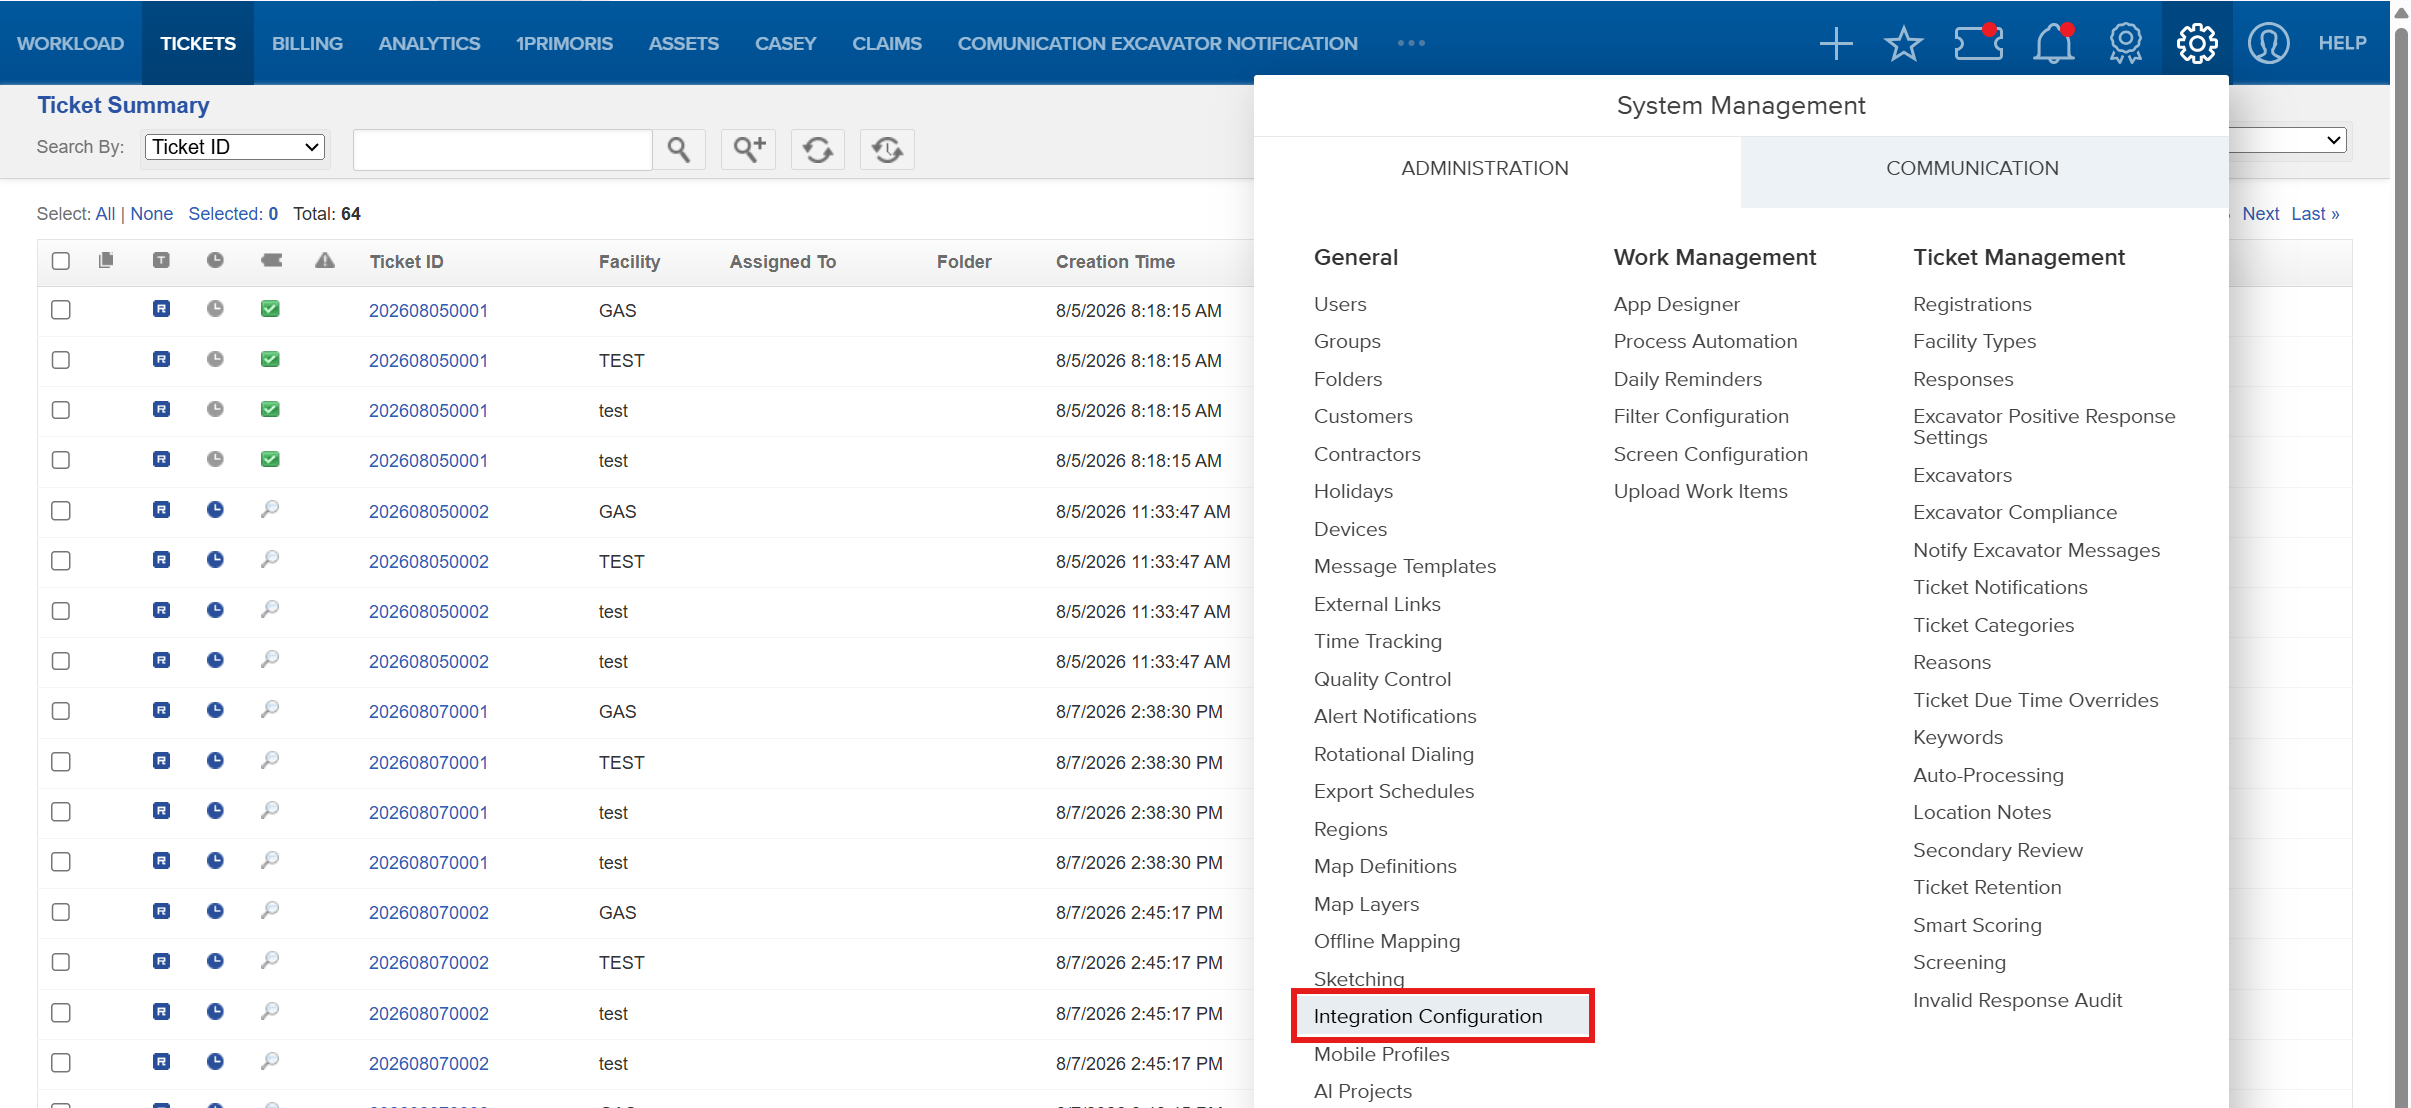
Things to Know:
- All integrations appear on the Integration Summary screen.
- Each integration has a system-generated API key.
- All available actions and methods are enabled by default.
- Methods may vary depending on the integration and selected forms.
- Actions are referred to as methods in the API documentation.
- You can add multiple forms to an integration.
- Each form can have its own available methods.
- Resetting an API key immediately replaces the existing key.
- If you reset an API key, you must update the key wherever the integration is used. Otherwise, the integration will no longer work.
- You can view change history from the Integration Summary screen or an individual Integration screen.
- Alert Notifications can be configured for errors associated with certain API methods.
Key Benefits/Use Cases:
Use API integrations to:
- Create a real-time connection between an external application and an Irth system.
- Load data from multiple applications.
- Control which methods an integration can use.
- Apply an integration to one or more forms.
- Configure different methods for individual forms.
- Review integration changes and identify who made them.
- Receive alerts when errors occur for supported API methods.
How It Works:
Review the Integration Summary
The Integration Summary screen displays the available integrations in a list.
From this screen, you can perform the following actions:
| Function | Description |
| Create a new integration | Select Create New Integration in the upper-right corner |
| Open an integration | Select the integration in the Integration Name column |
| Review API documentation | Select API Documentation in the API Key column. The available methods depend on the integration configuration. |
| Edit an integration | Select the integration in the Integration Name column. |
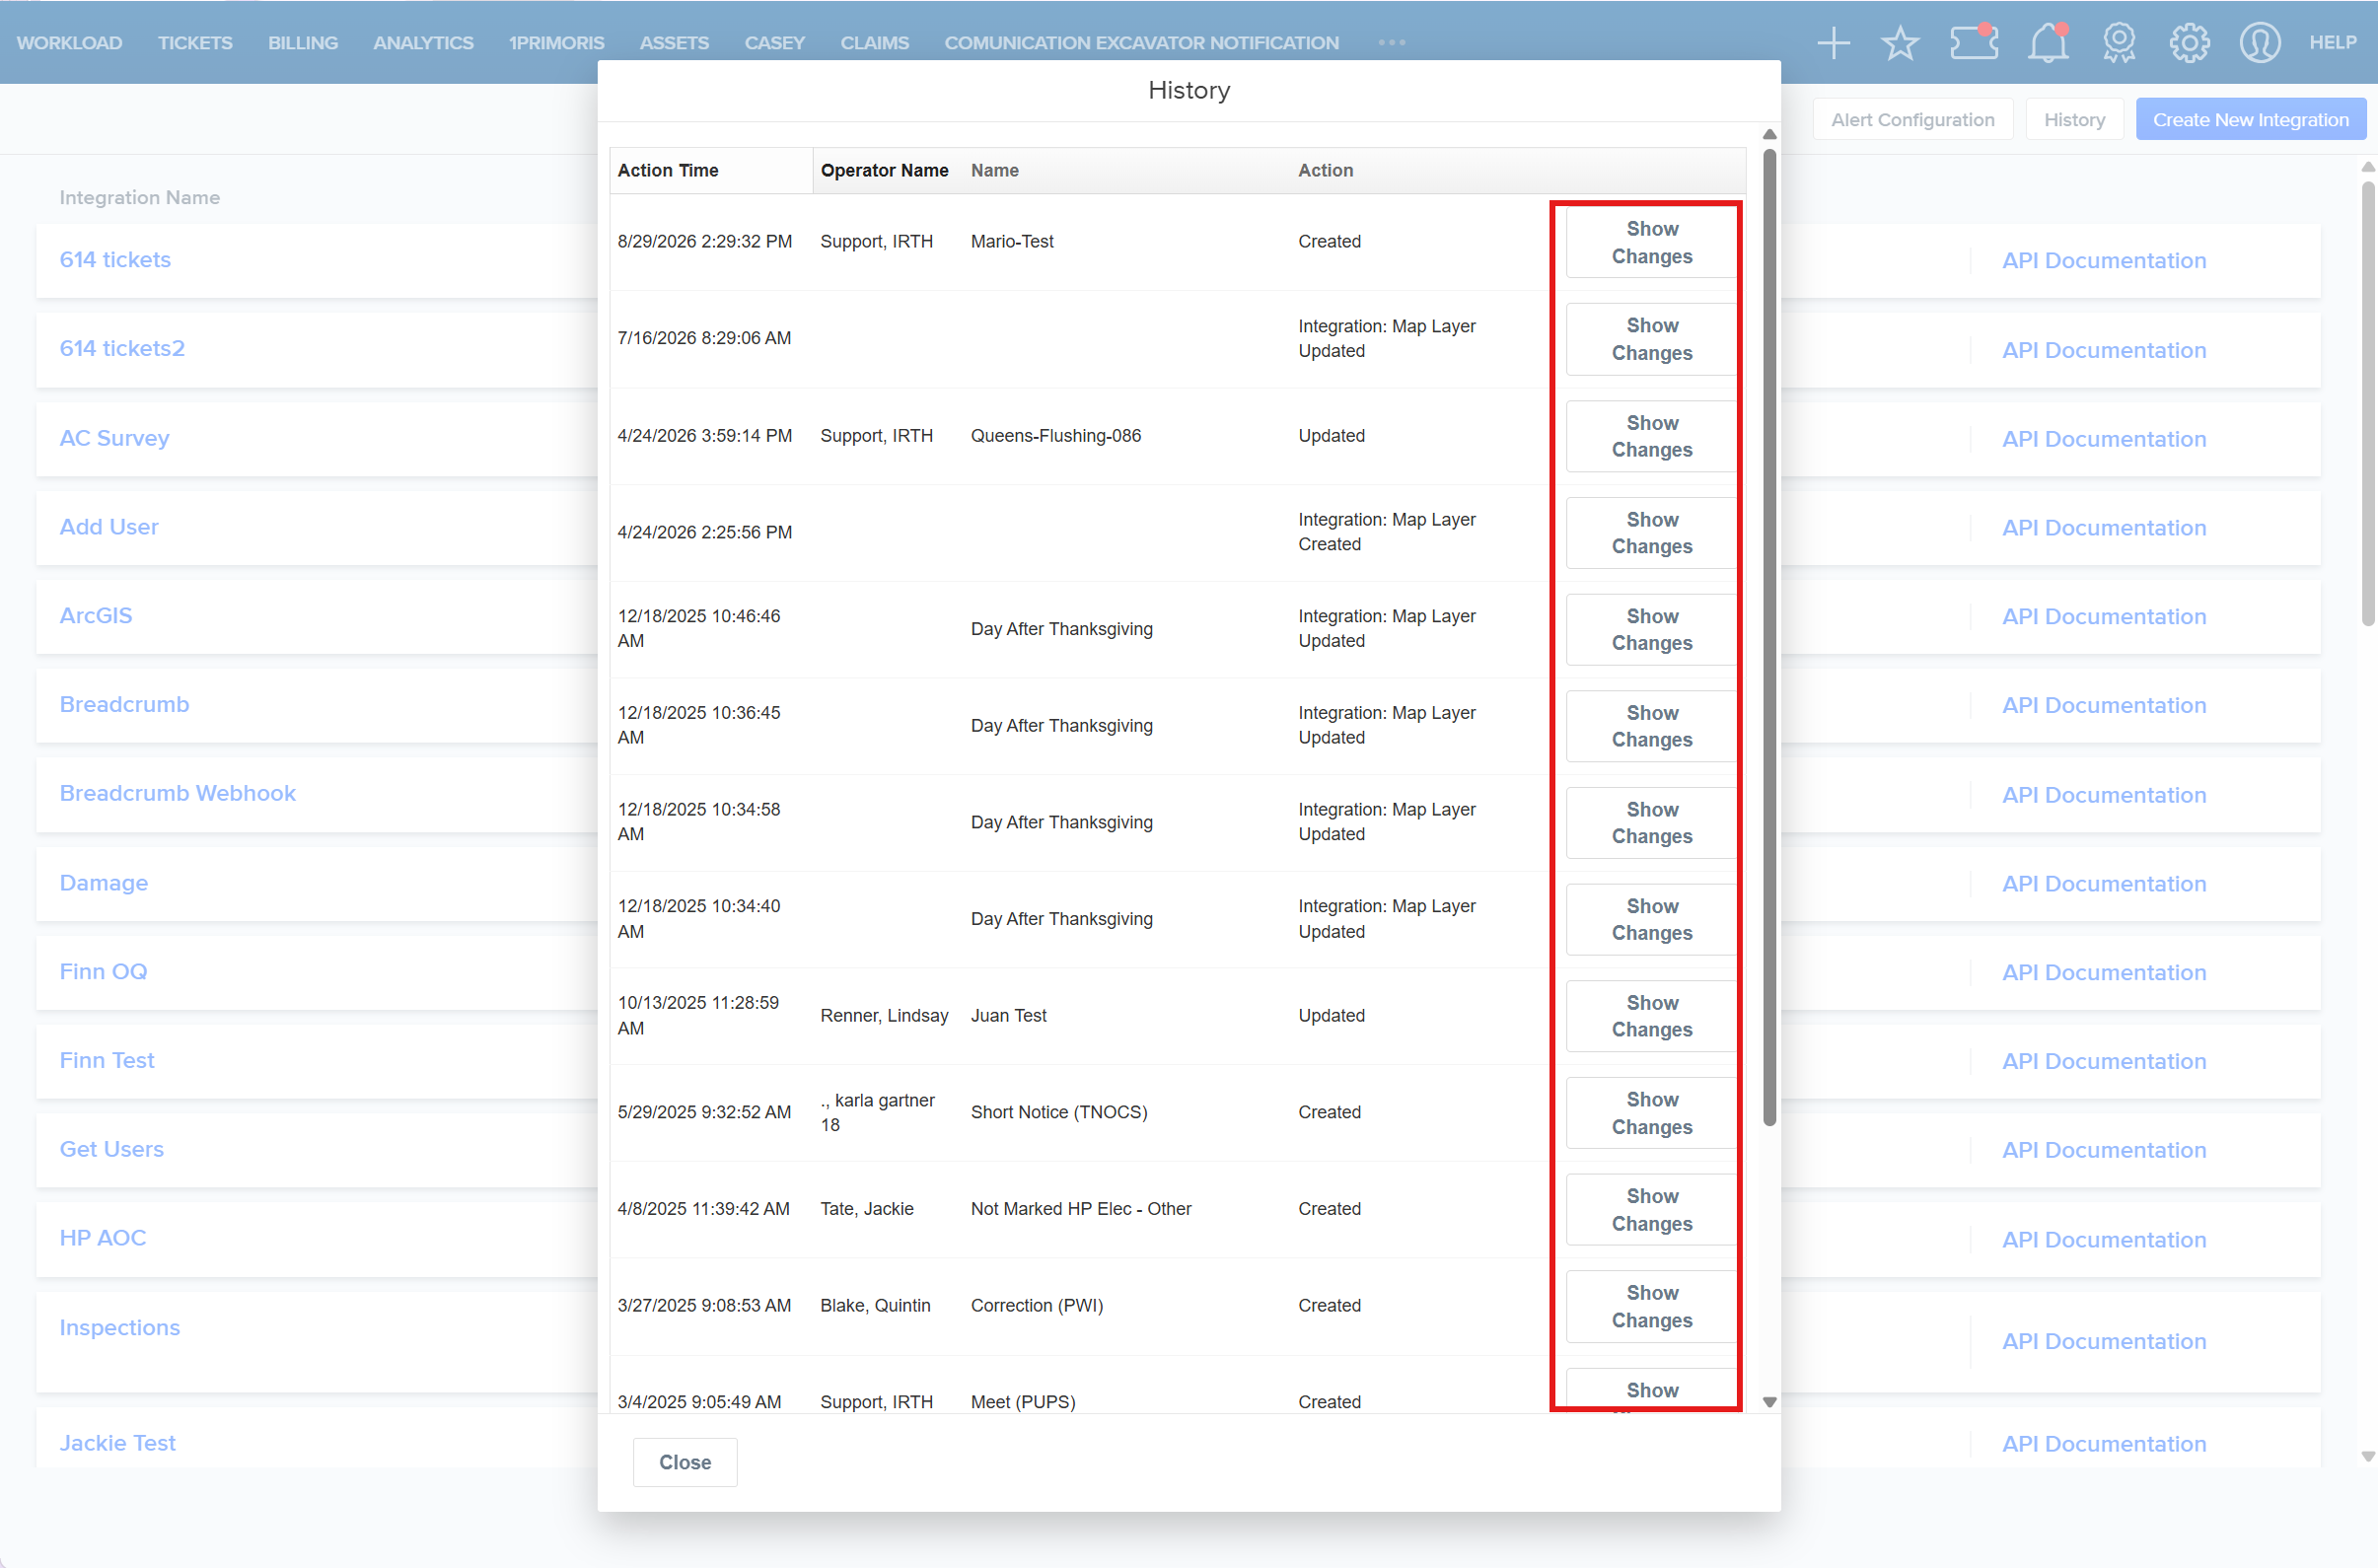
| View integration history | Select History in the upper-right corner. The History window displays changes made to all integrations. Select Show Changes to review a description of an individual change. |
Create an Integration
- Go to System Management > Administration > Work Management > Integration Configuration.
- On the Integration Summary screen, select Create New Integration.

- In the Create Integration window, enter an Integration Name and select Continue.
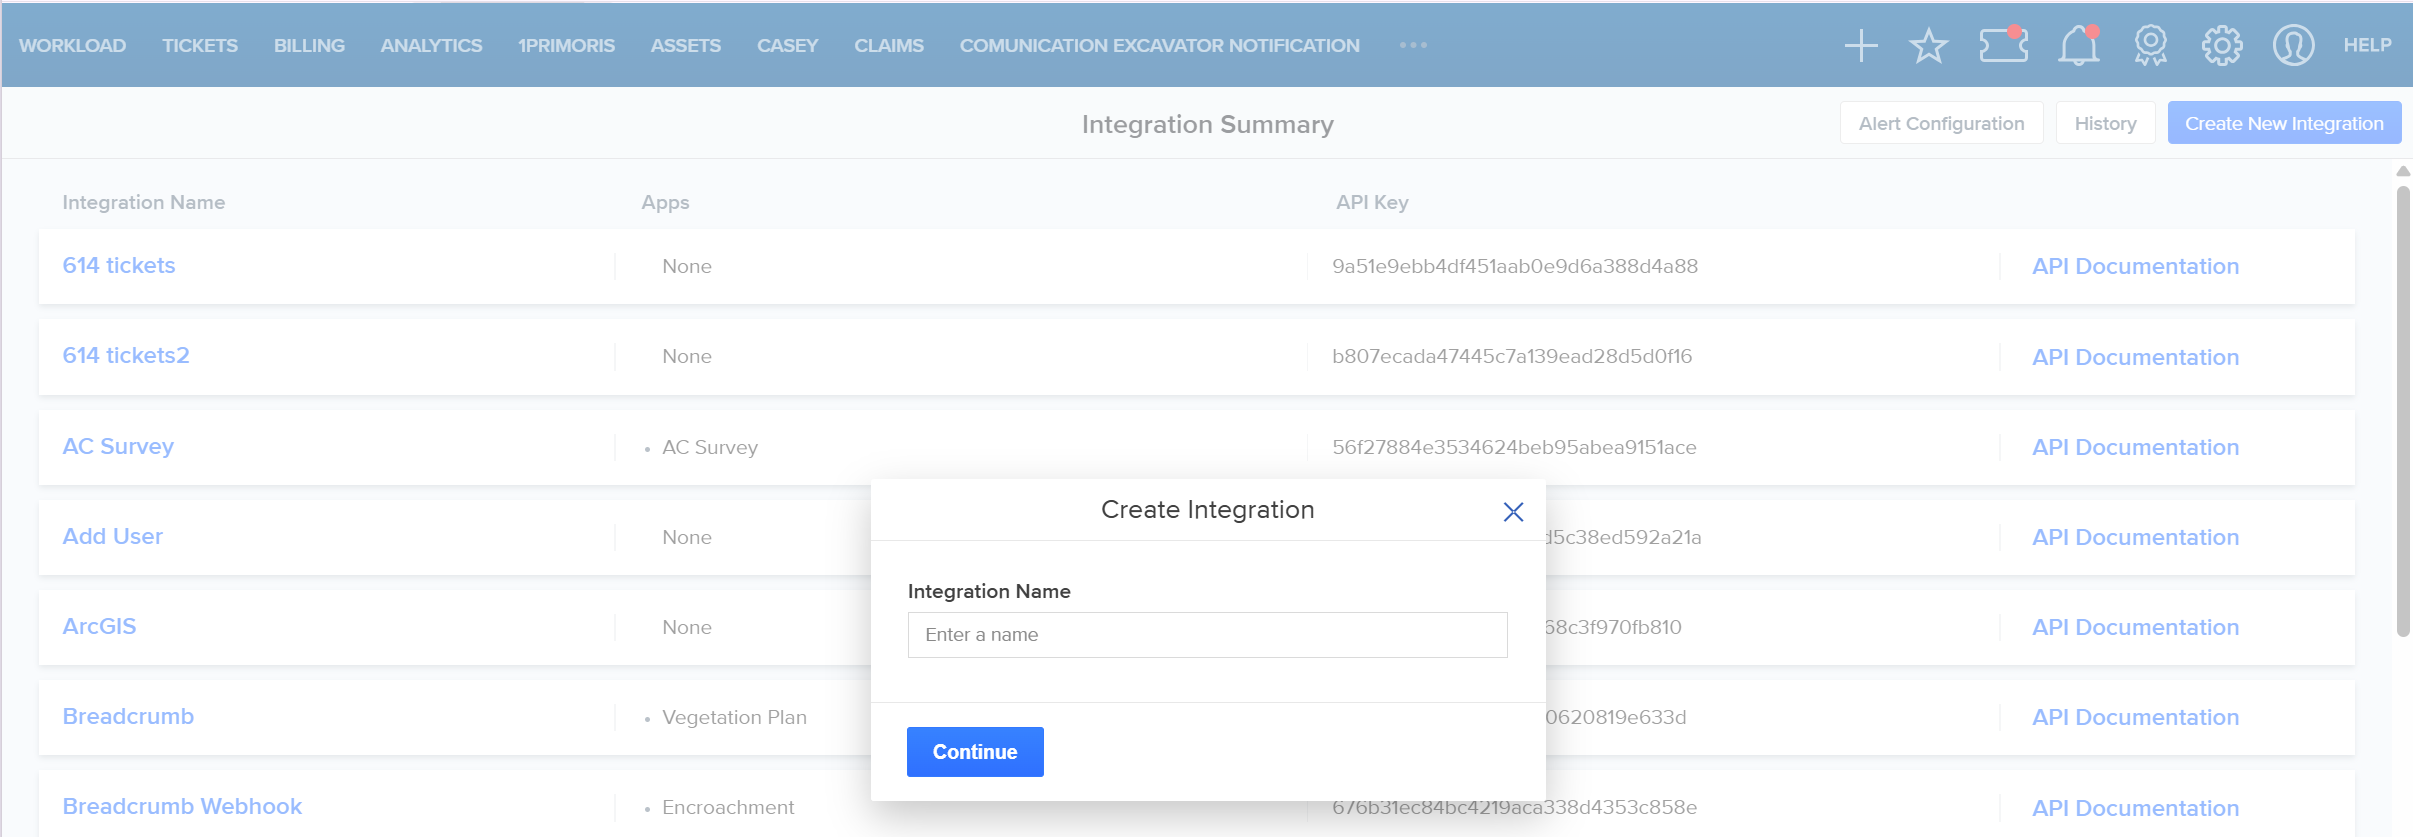
- Configure the integration’s general settings, methods, and forms.
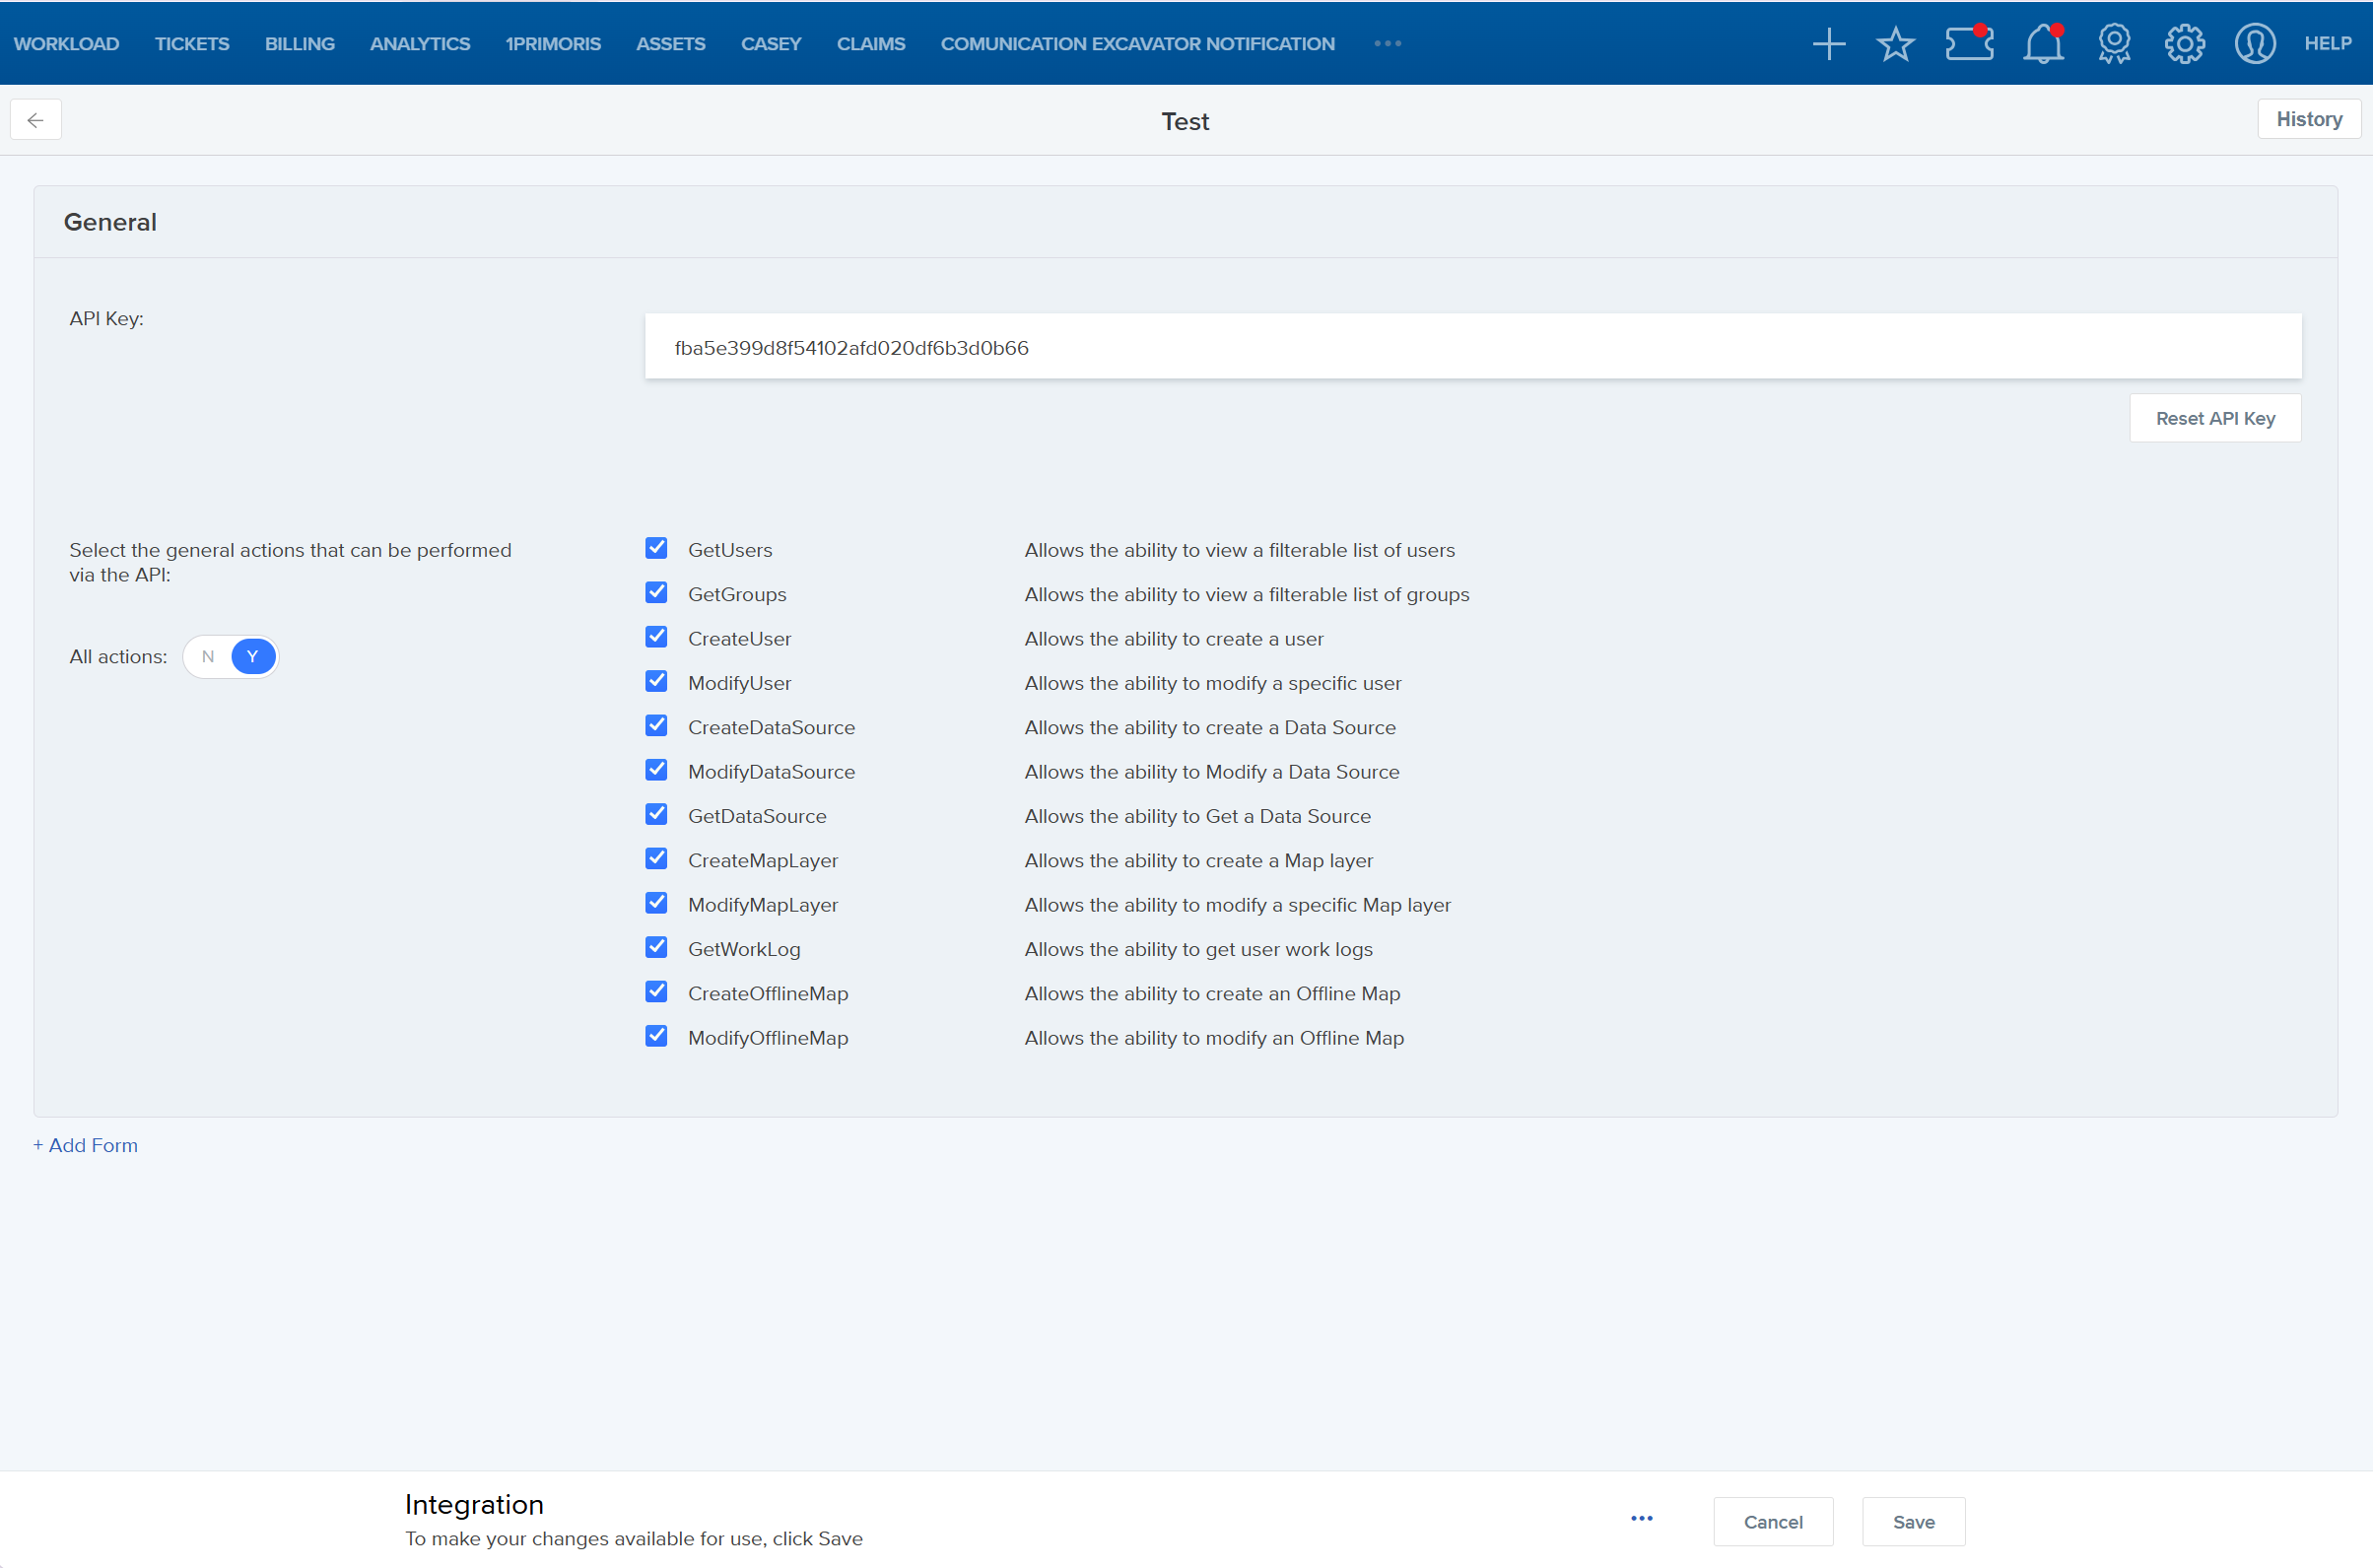
- Select Save.

Modify an Integration
- Go to System Management > Administration > Work Management > Integration Configuration.
- On the Integration Summary screen, locate the integration you want to modify and select it.
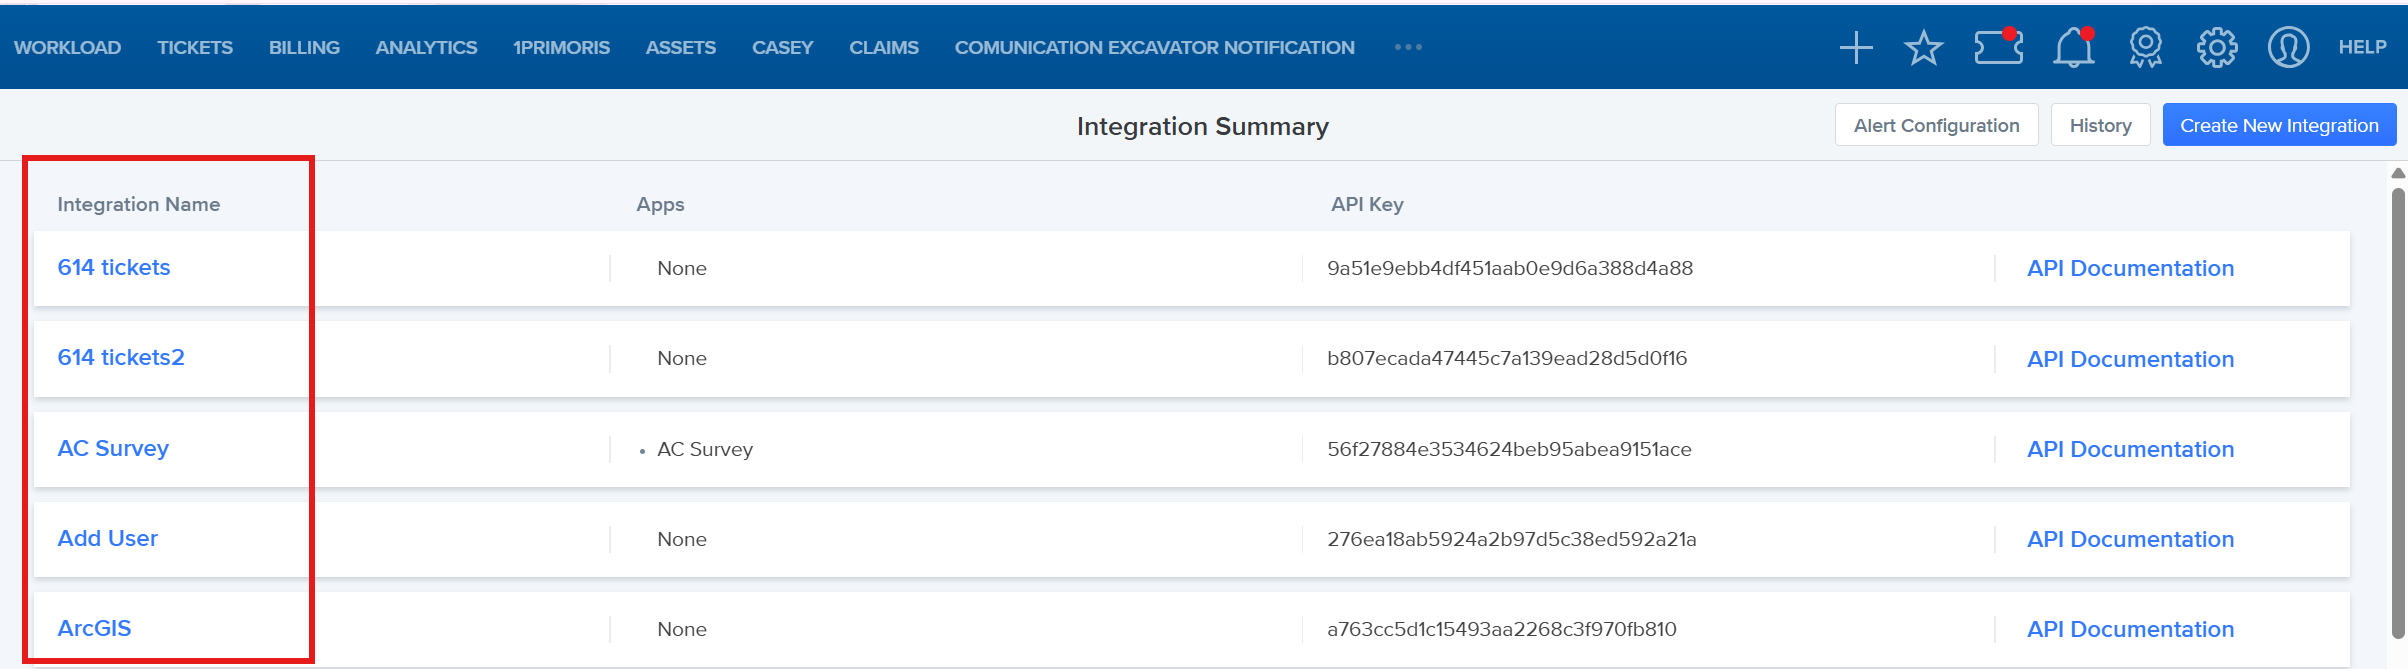
- Update the applicable settings.
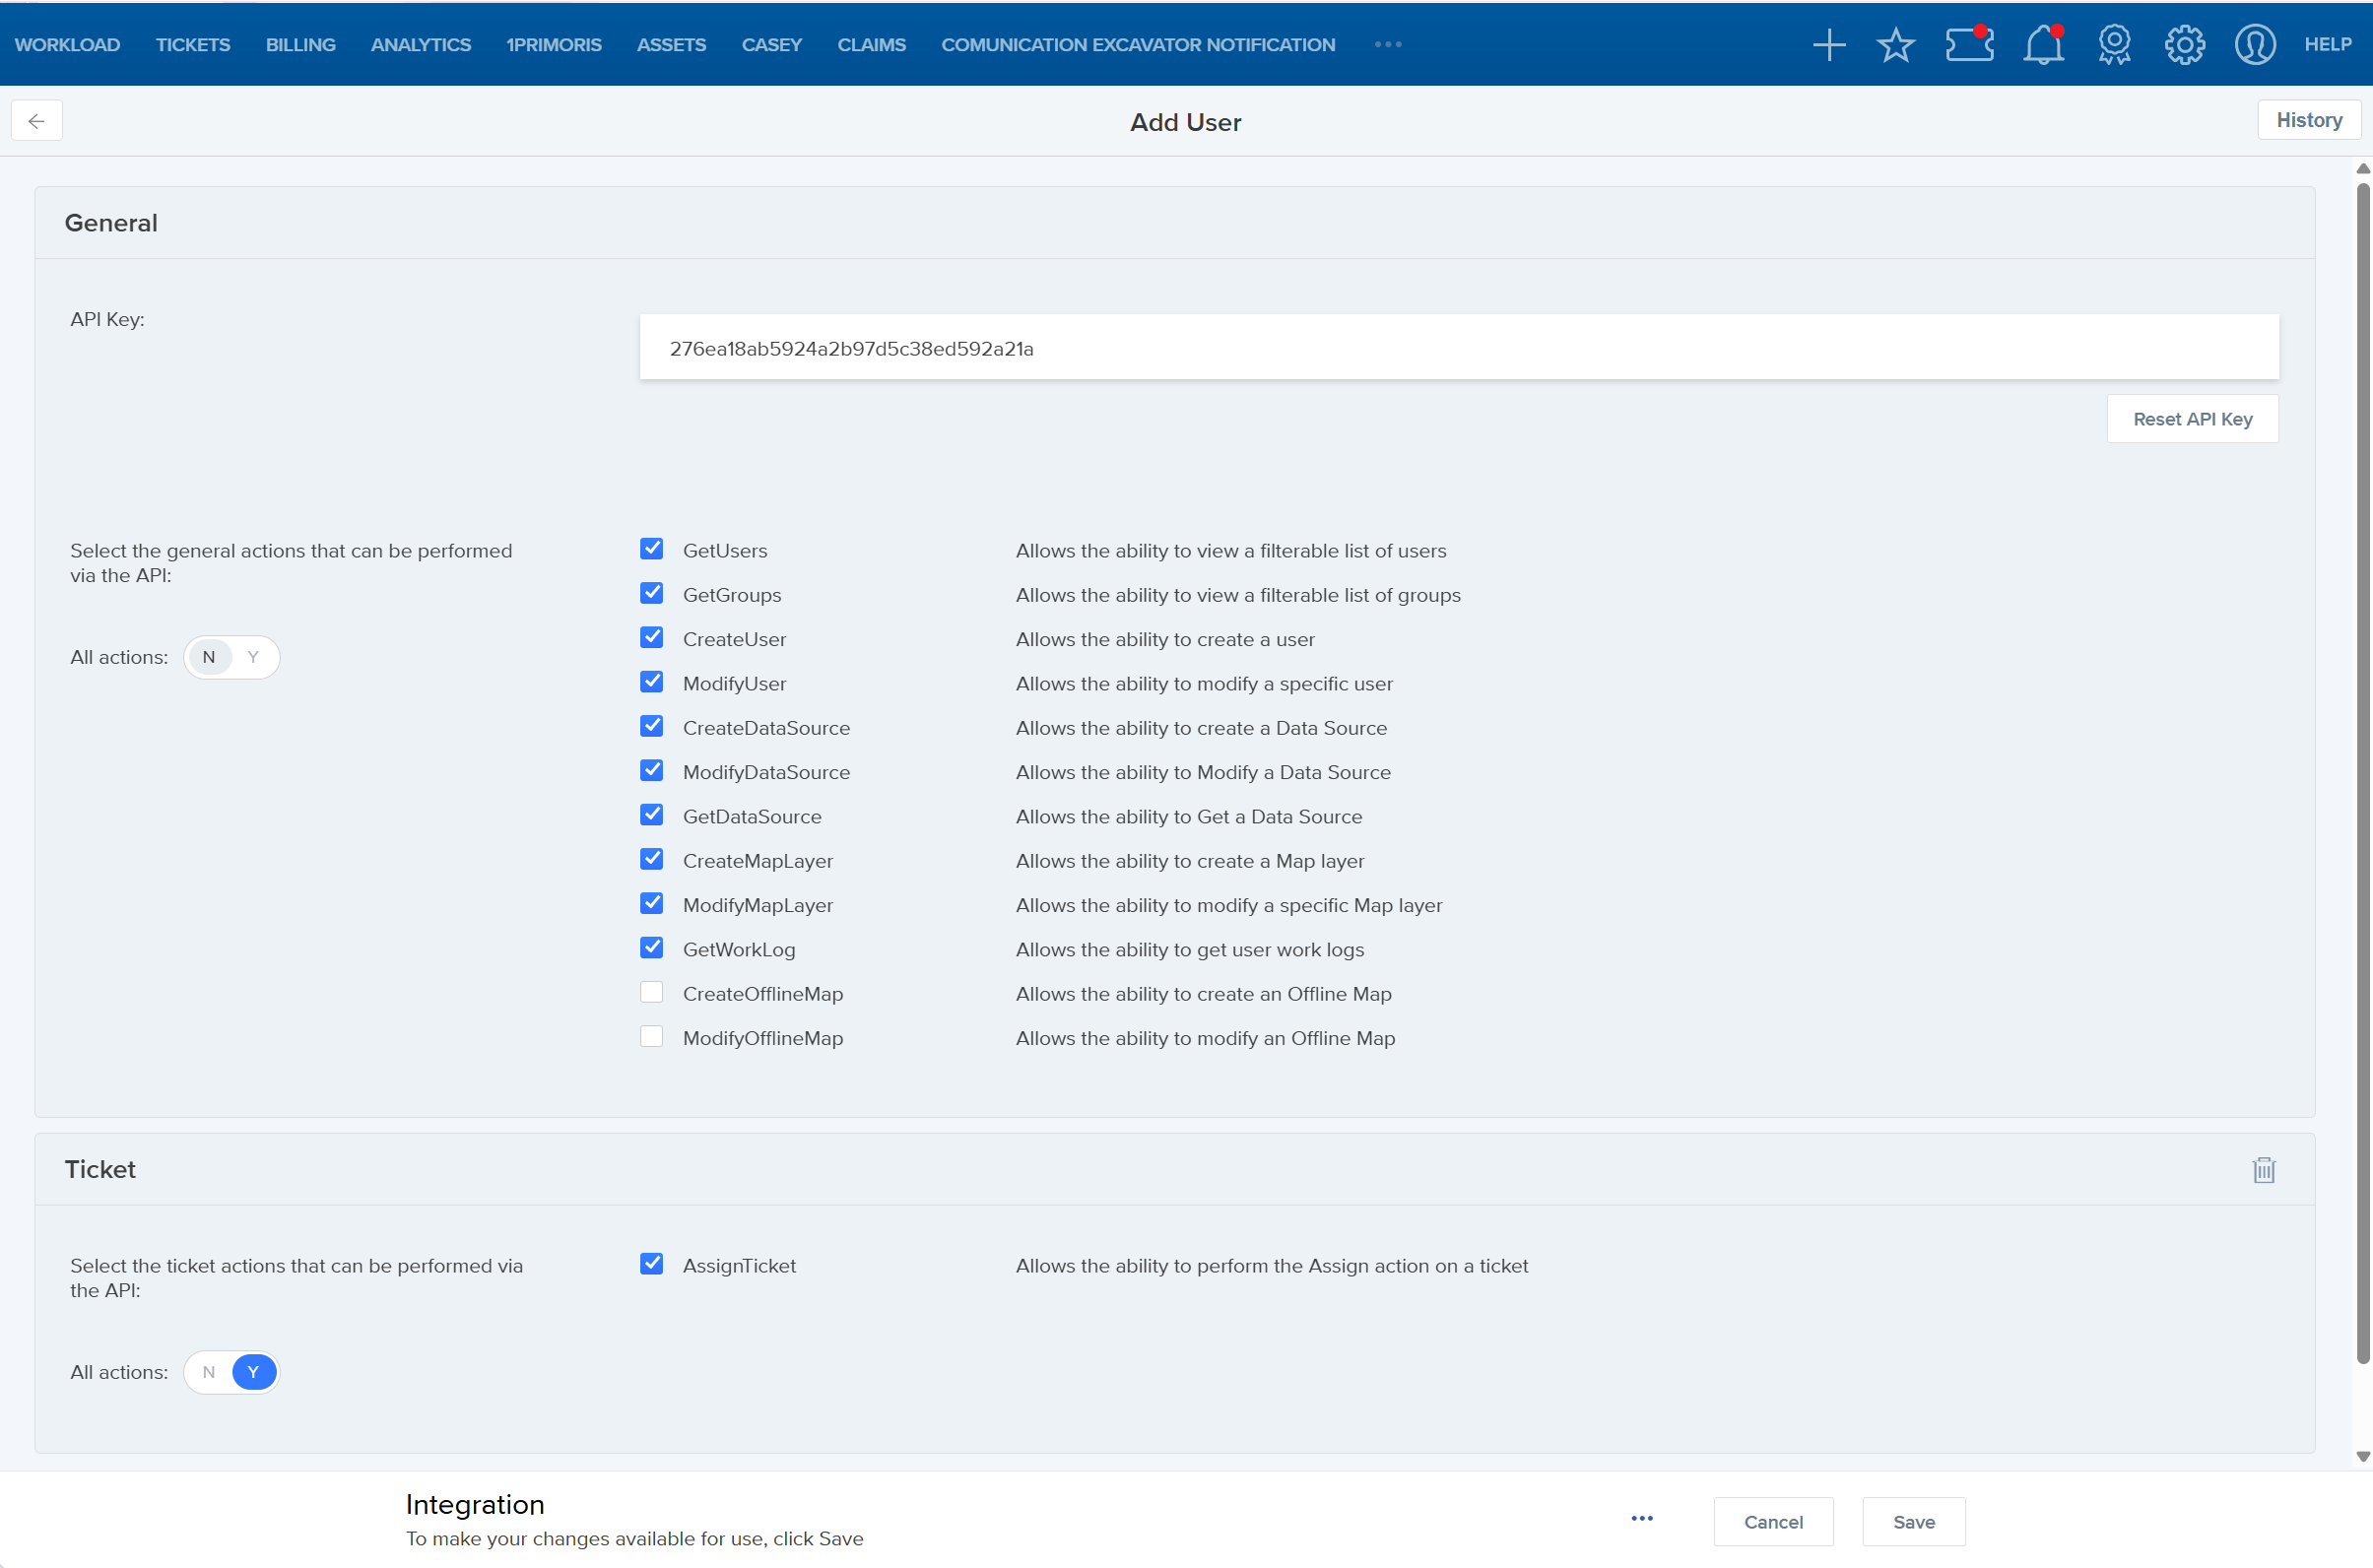
- Select Save to keep your changes or Cancel to discard them.

Configure General Settings
The General section displays the integration’s API key and available general methods.
All general methods are enabled by default. Select or clear the applicable checkboxes to control which methods the integration can use.
If all methods are currently enabled and you want to modify the selections:
- Select All Actions.
- Select the applicable methods.
- Clear the checkbox for any method that should not be available.
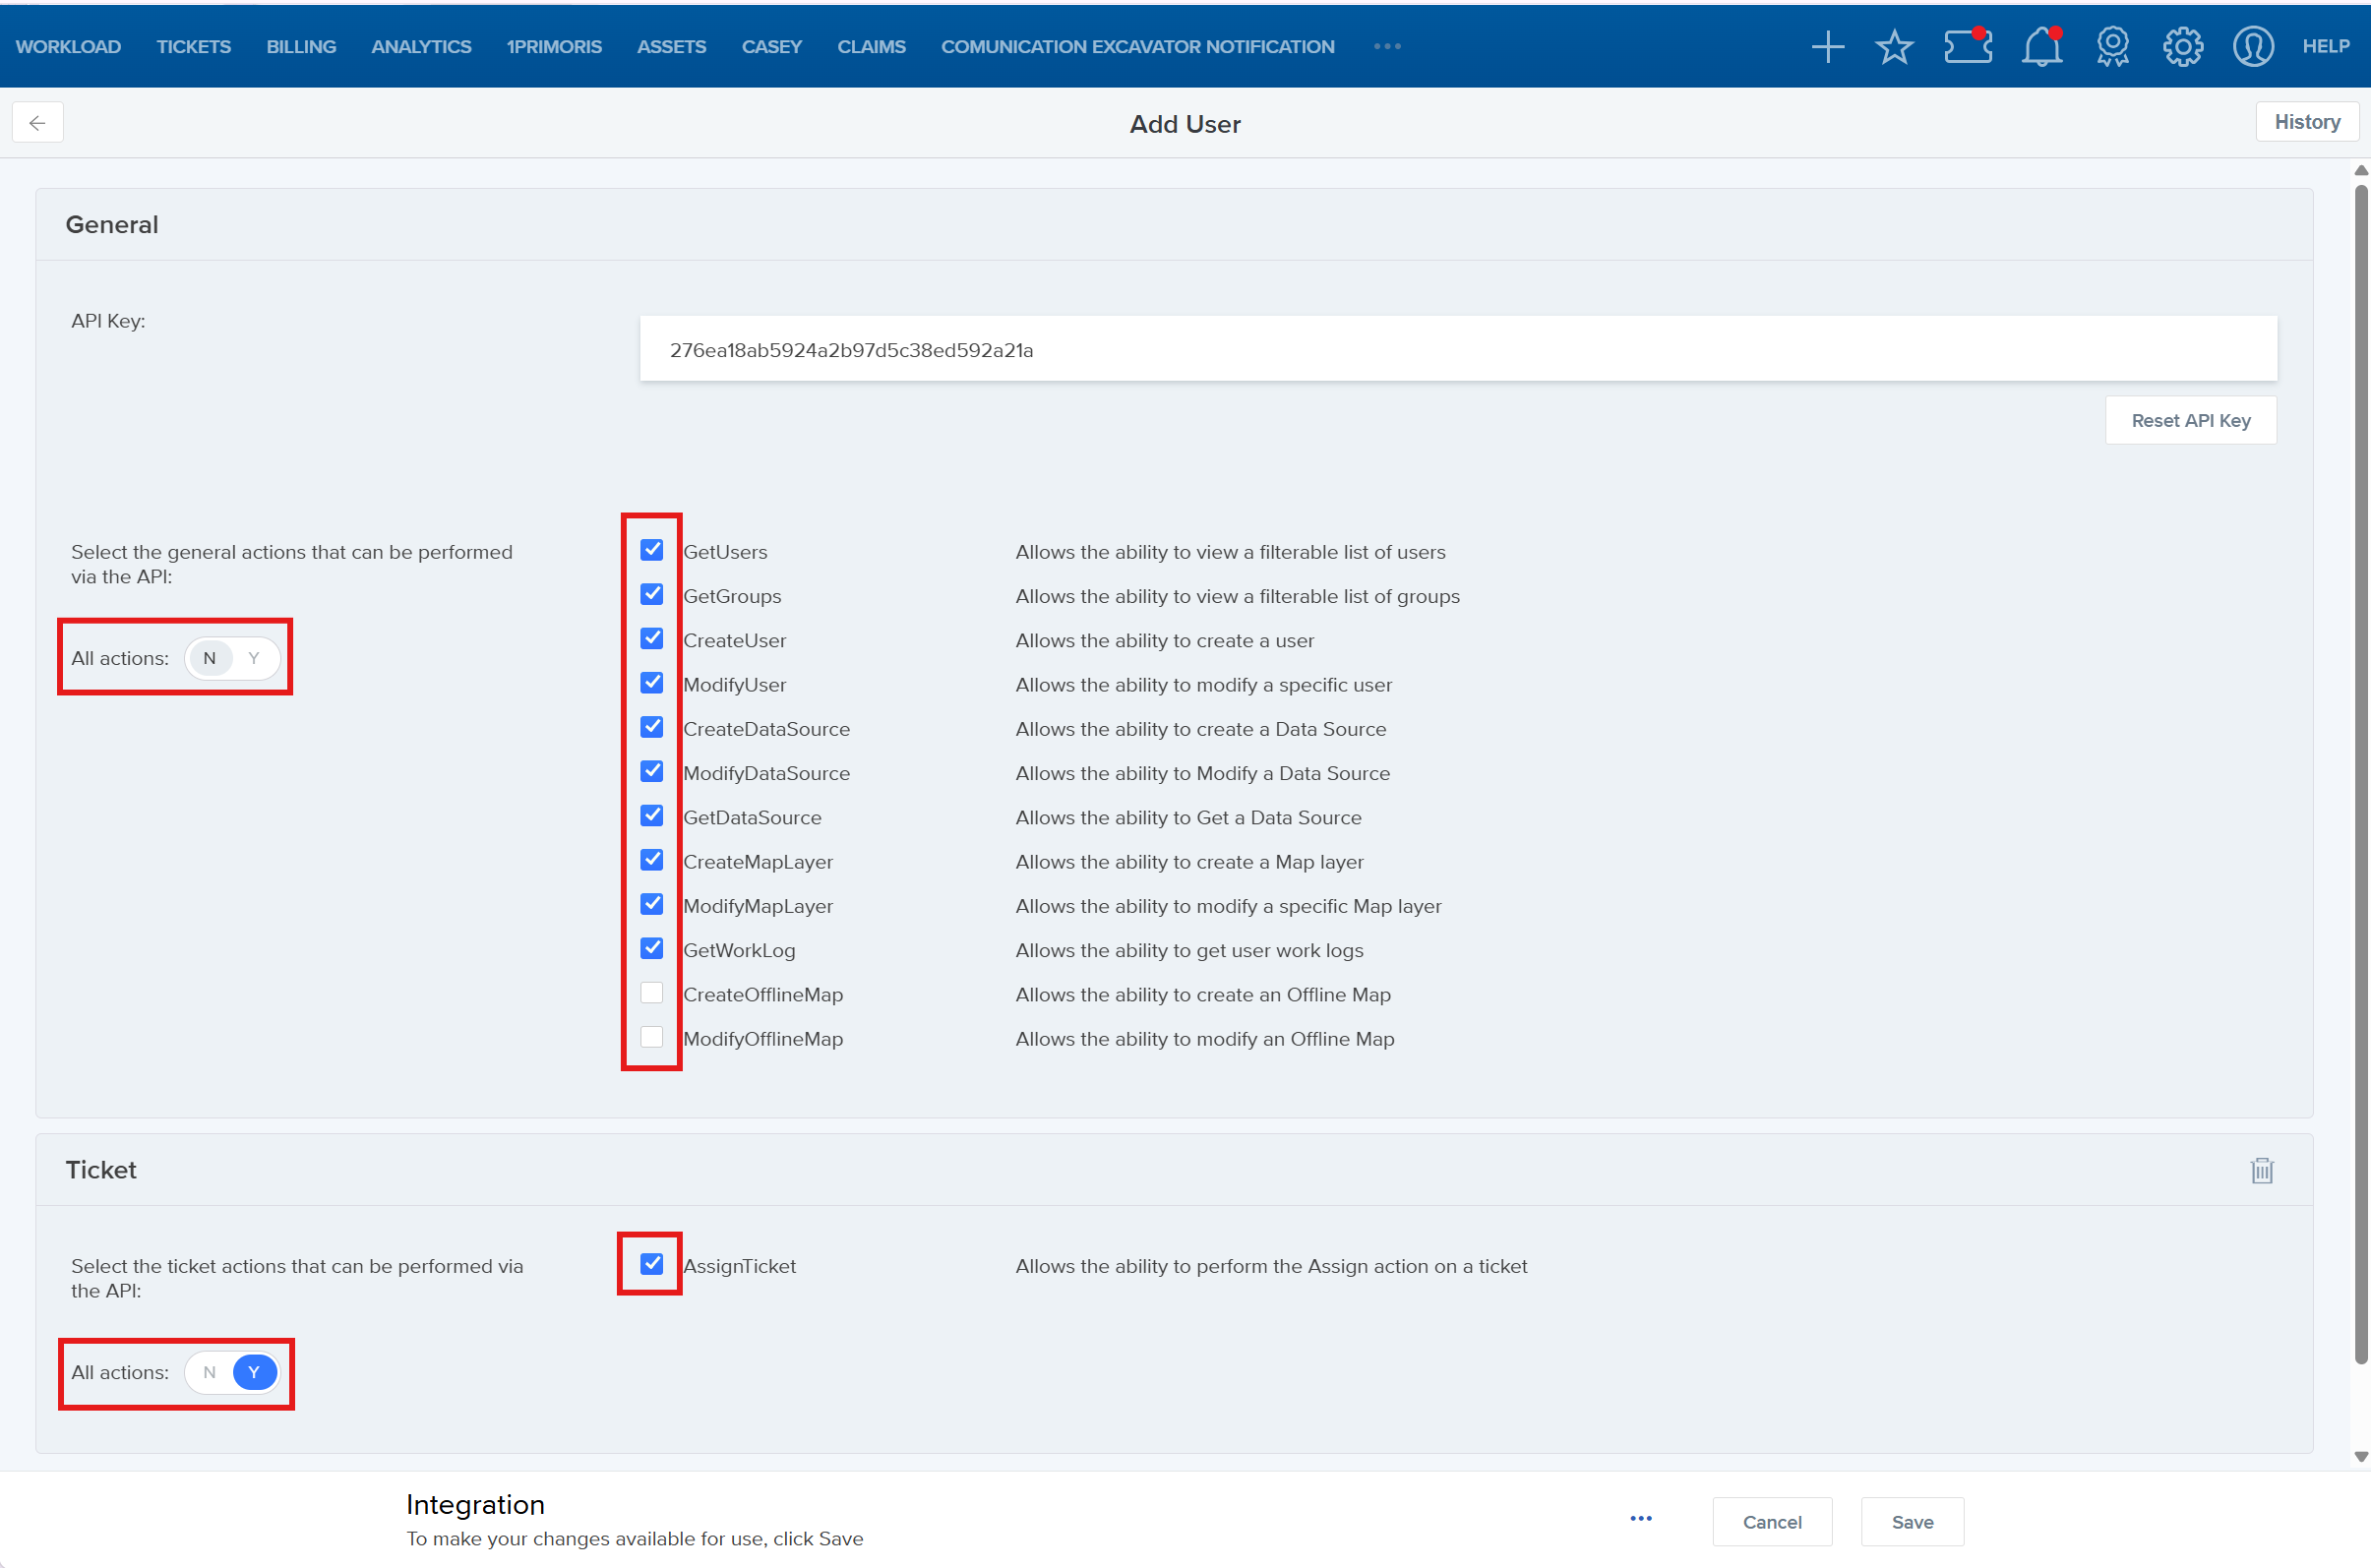
For method definitions and technical requirements, refer to the applicable API documentation:
Reset the API Key
The API key is generated by the system.
To generate a new key:
- Open the integration.
- In the General section, select Reset API Key.
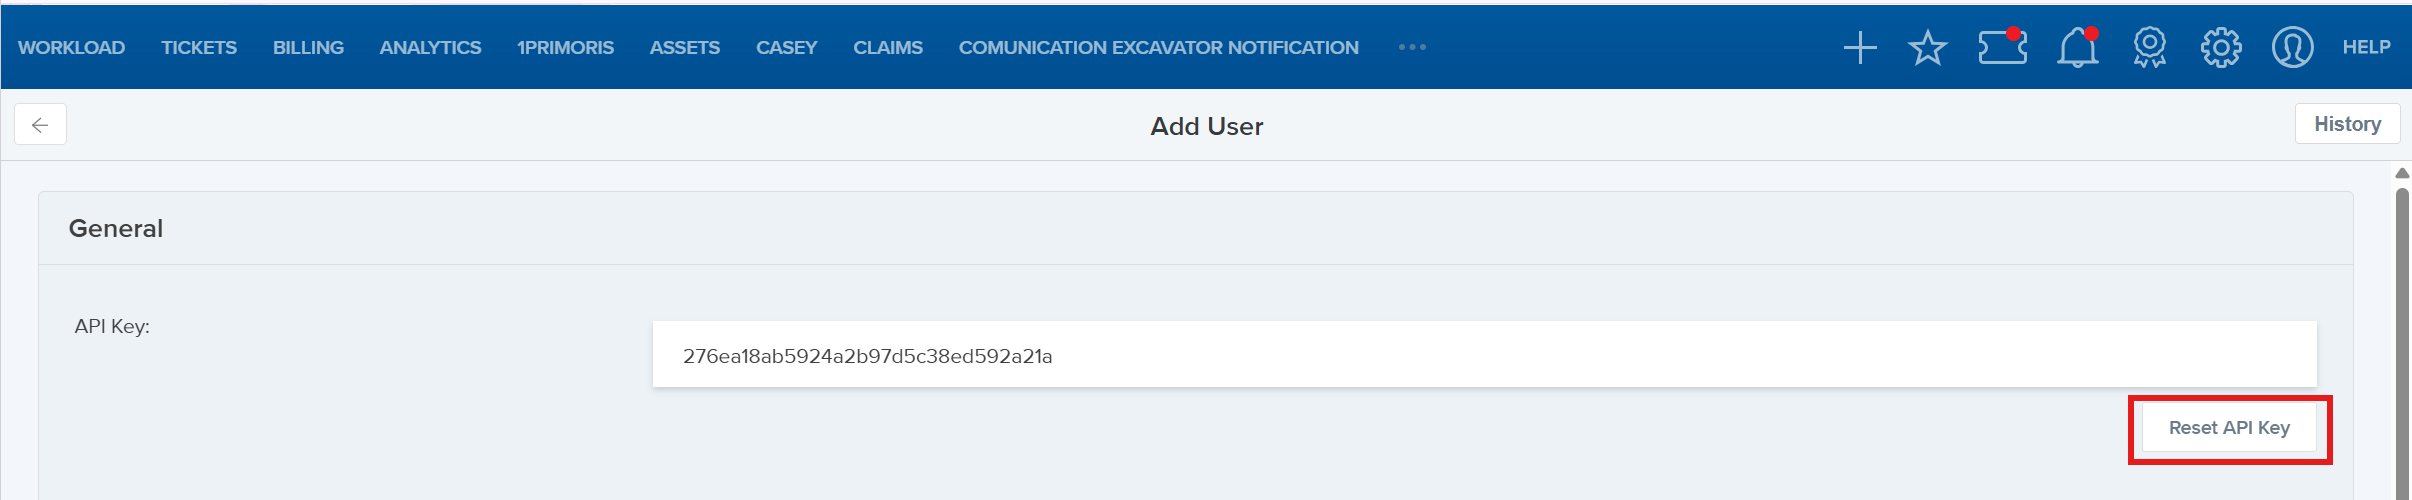
- Update the API key in the connected application or form.
Add a Form
Forms determine where the API integration applies.
To add a form:
- In the lower-left corner of the Integration screen, select + Add Form. If you do not see the + Add Form button, scroll to the bottom of the screen.
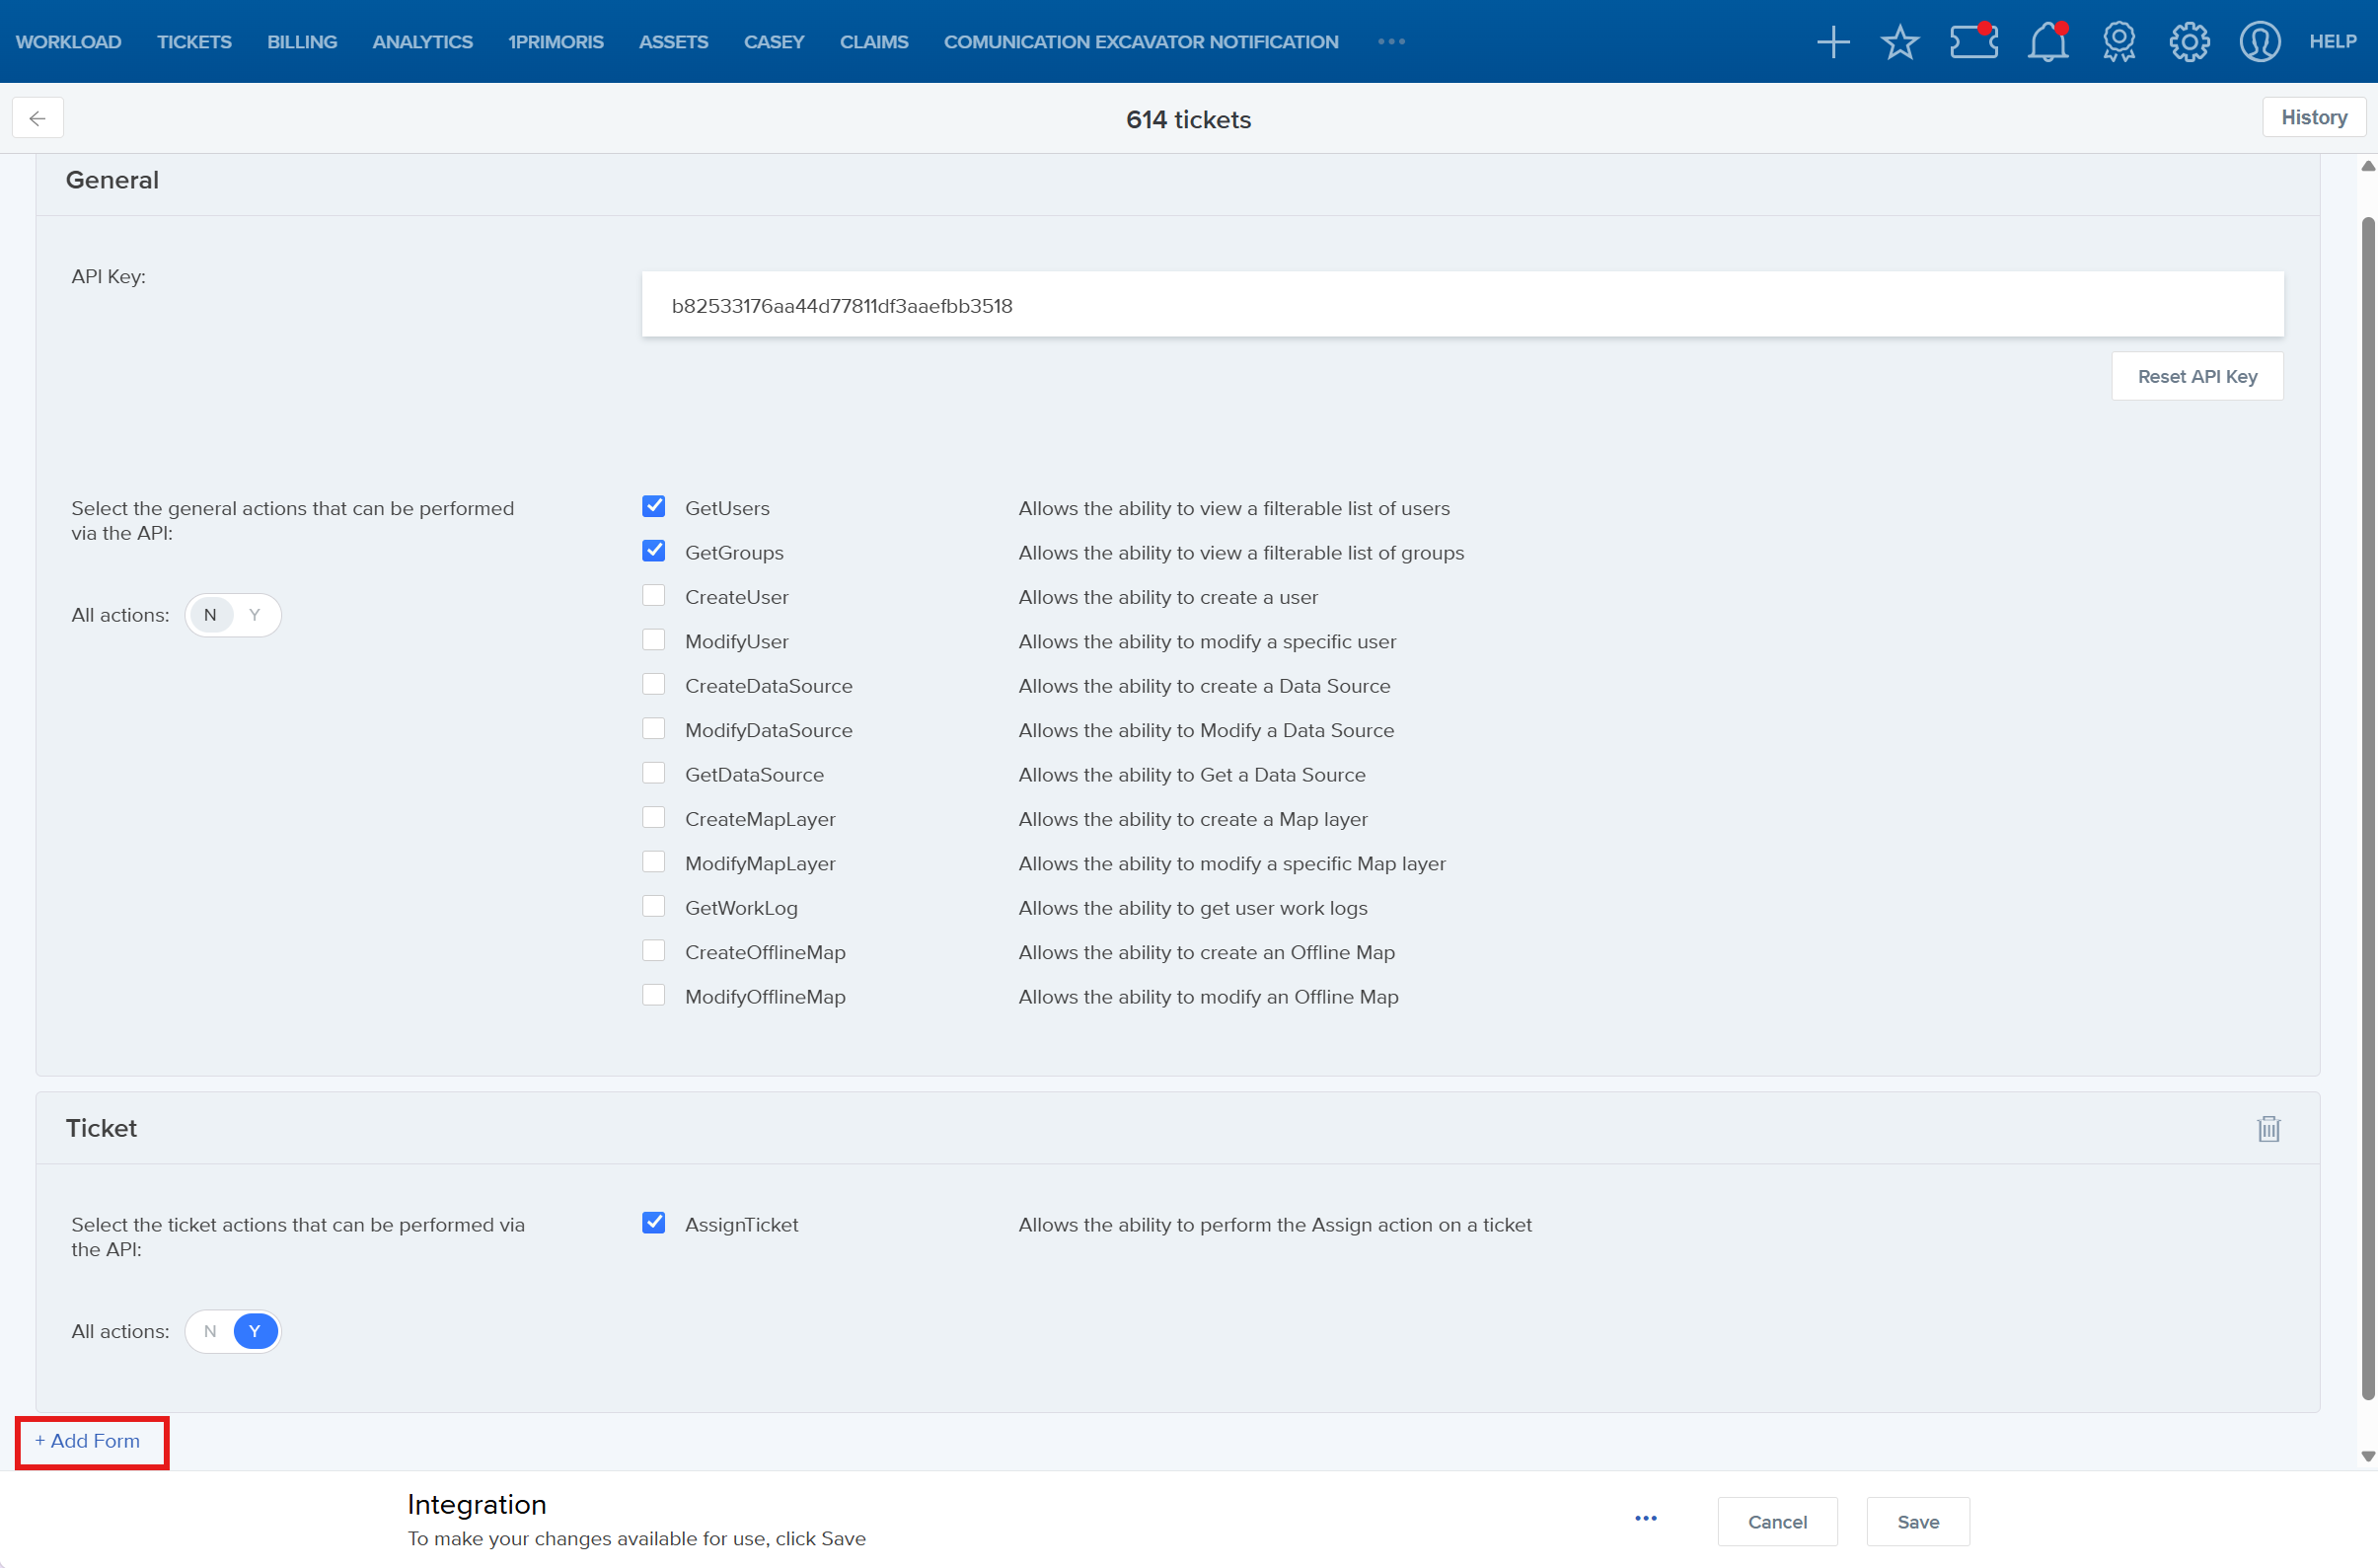
- Select a form from the dropdown list.
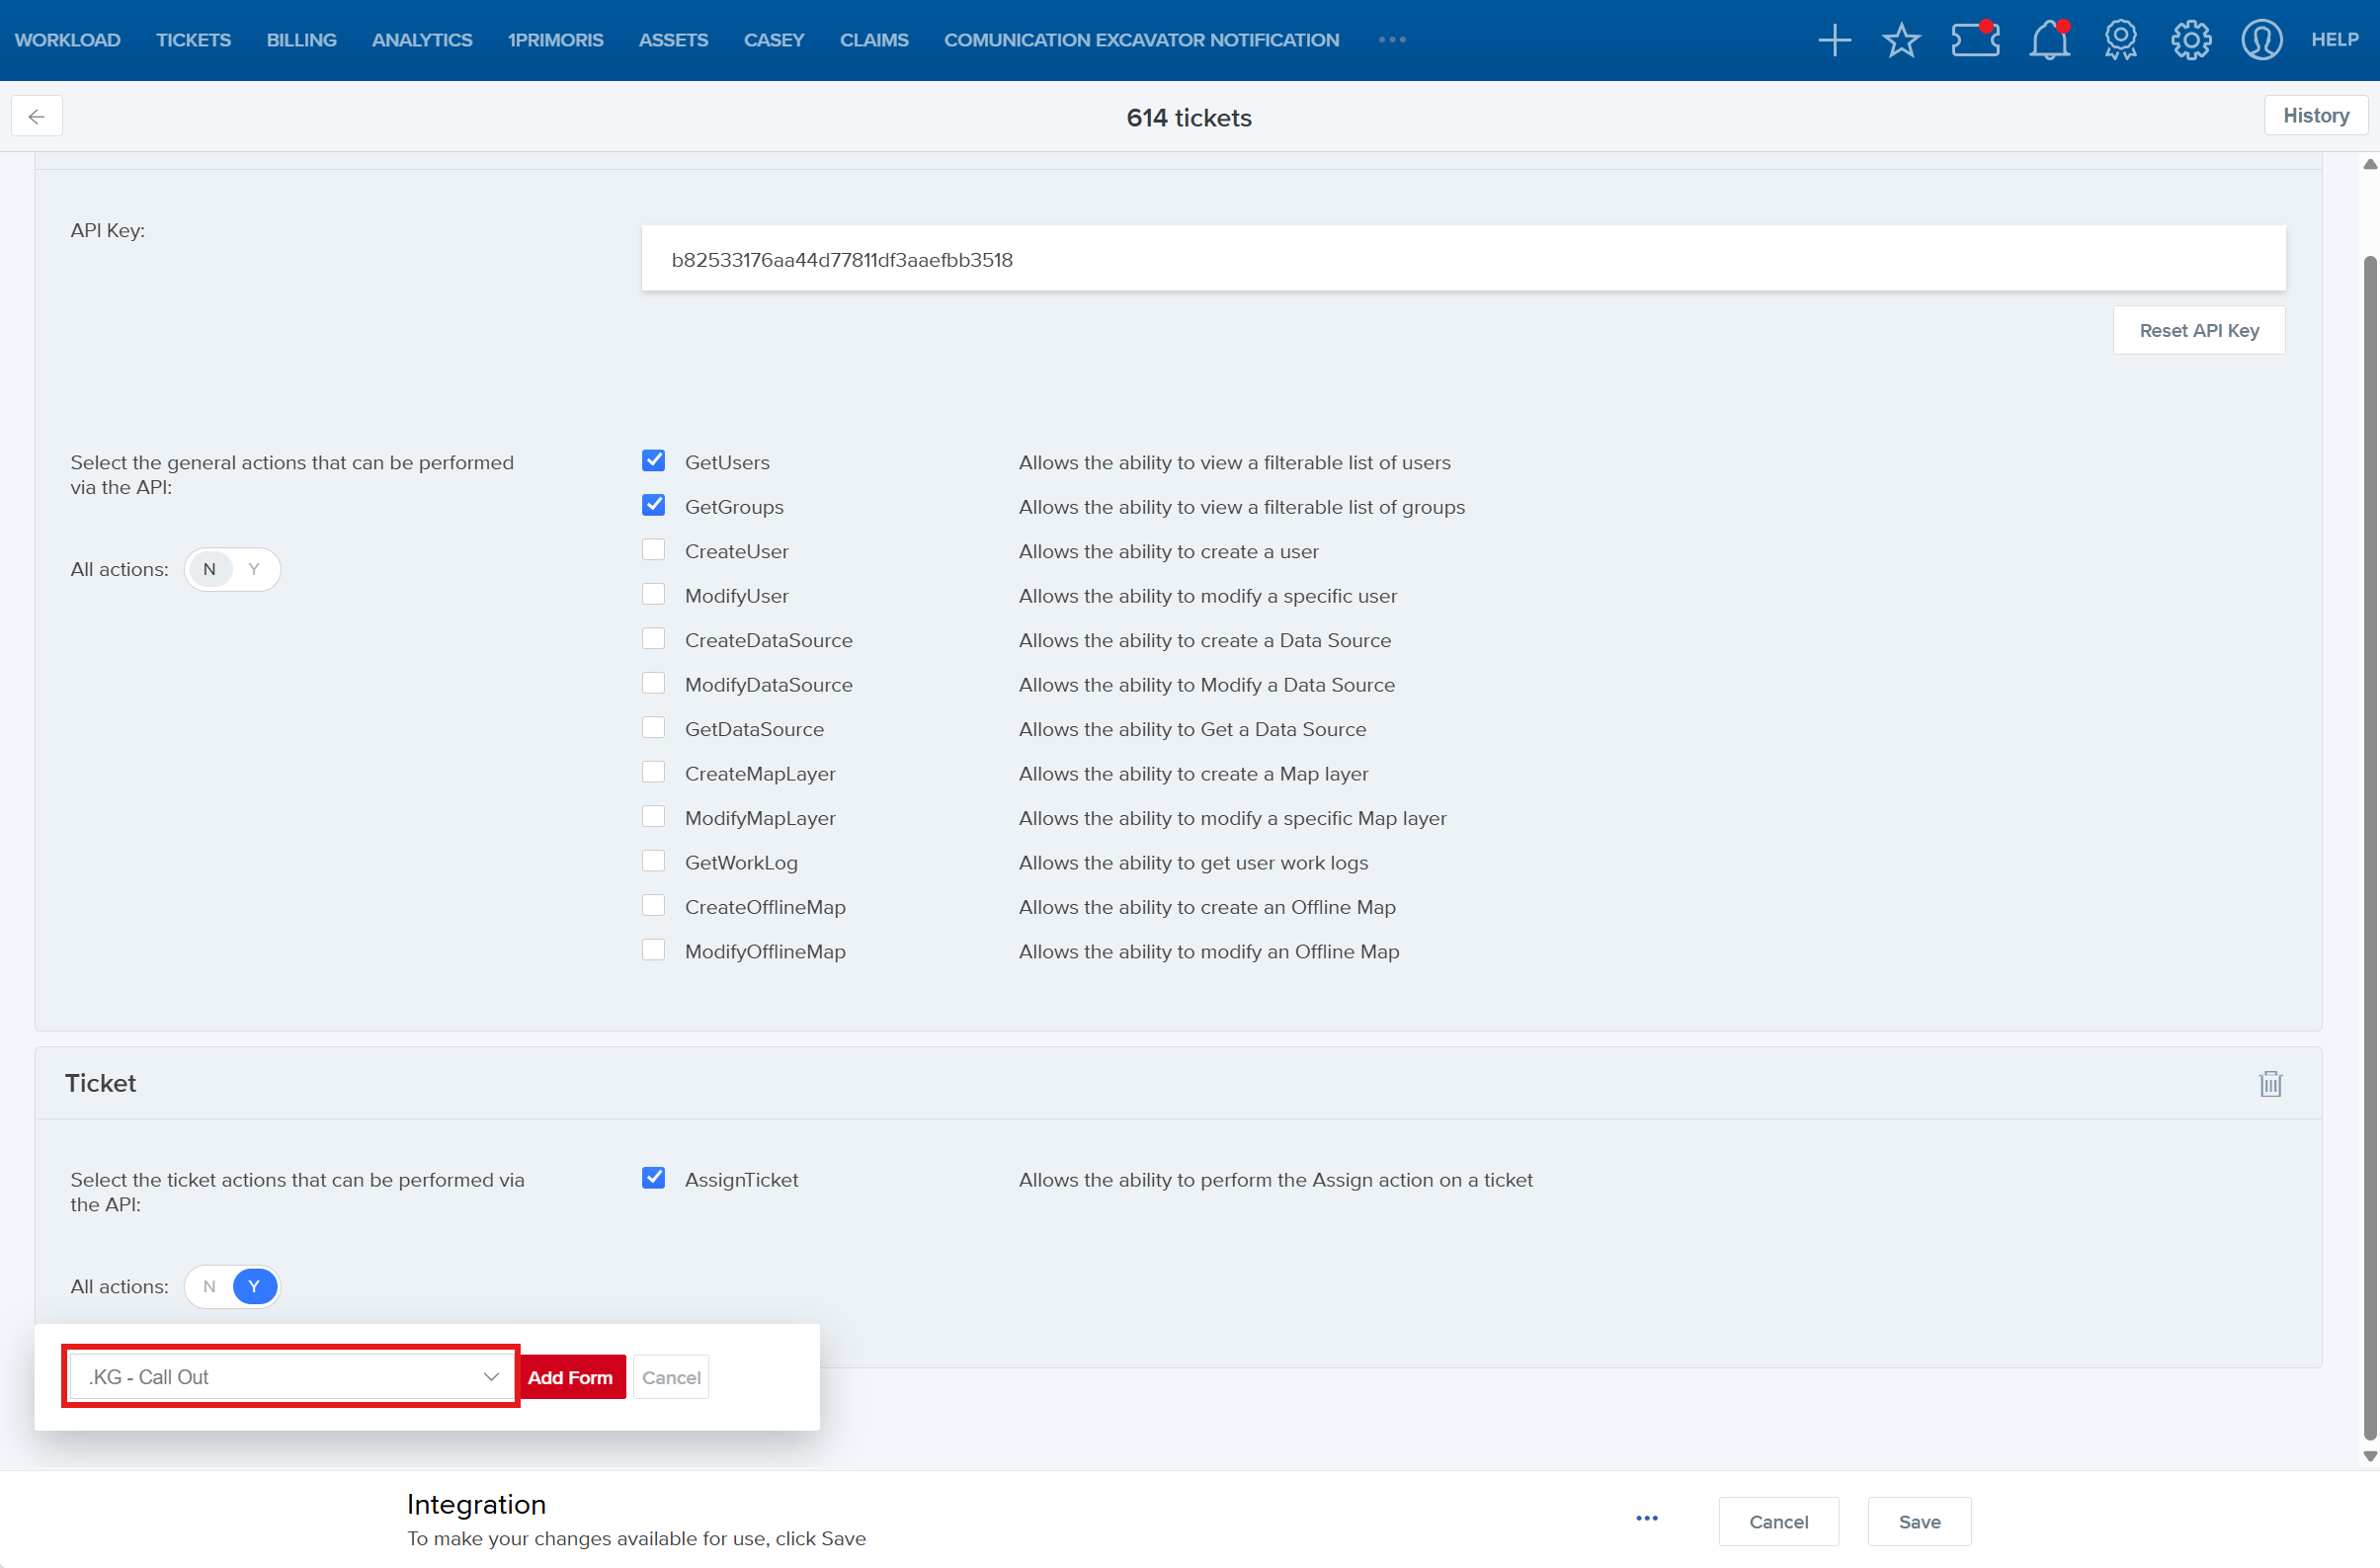
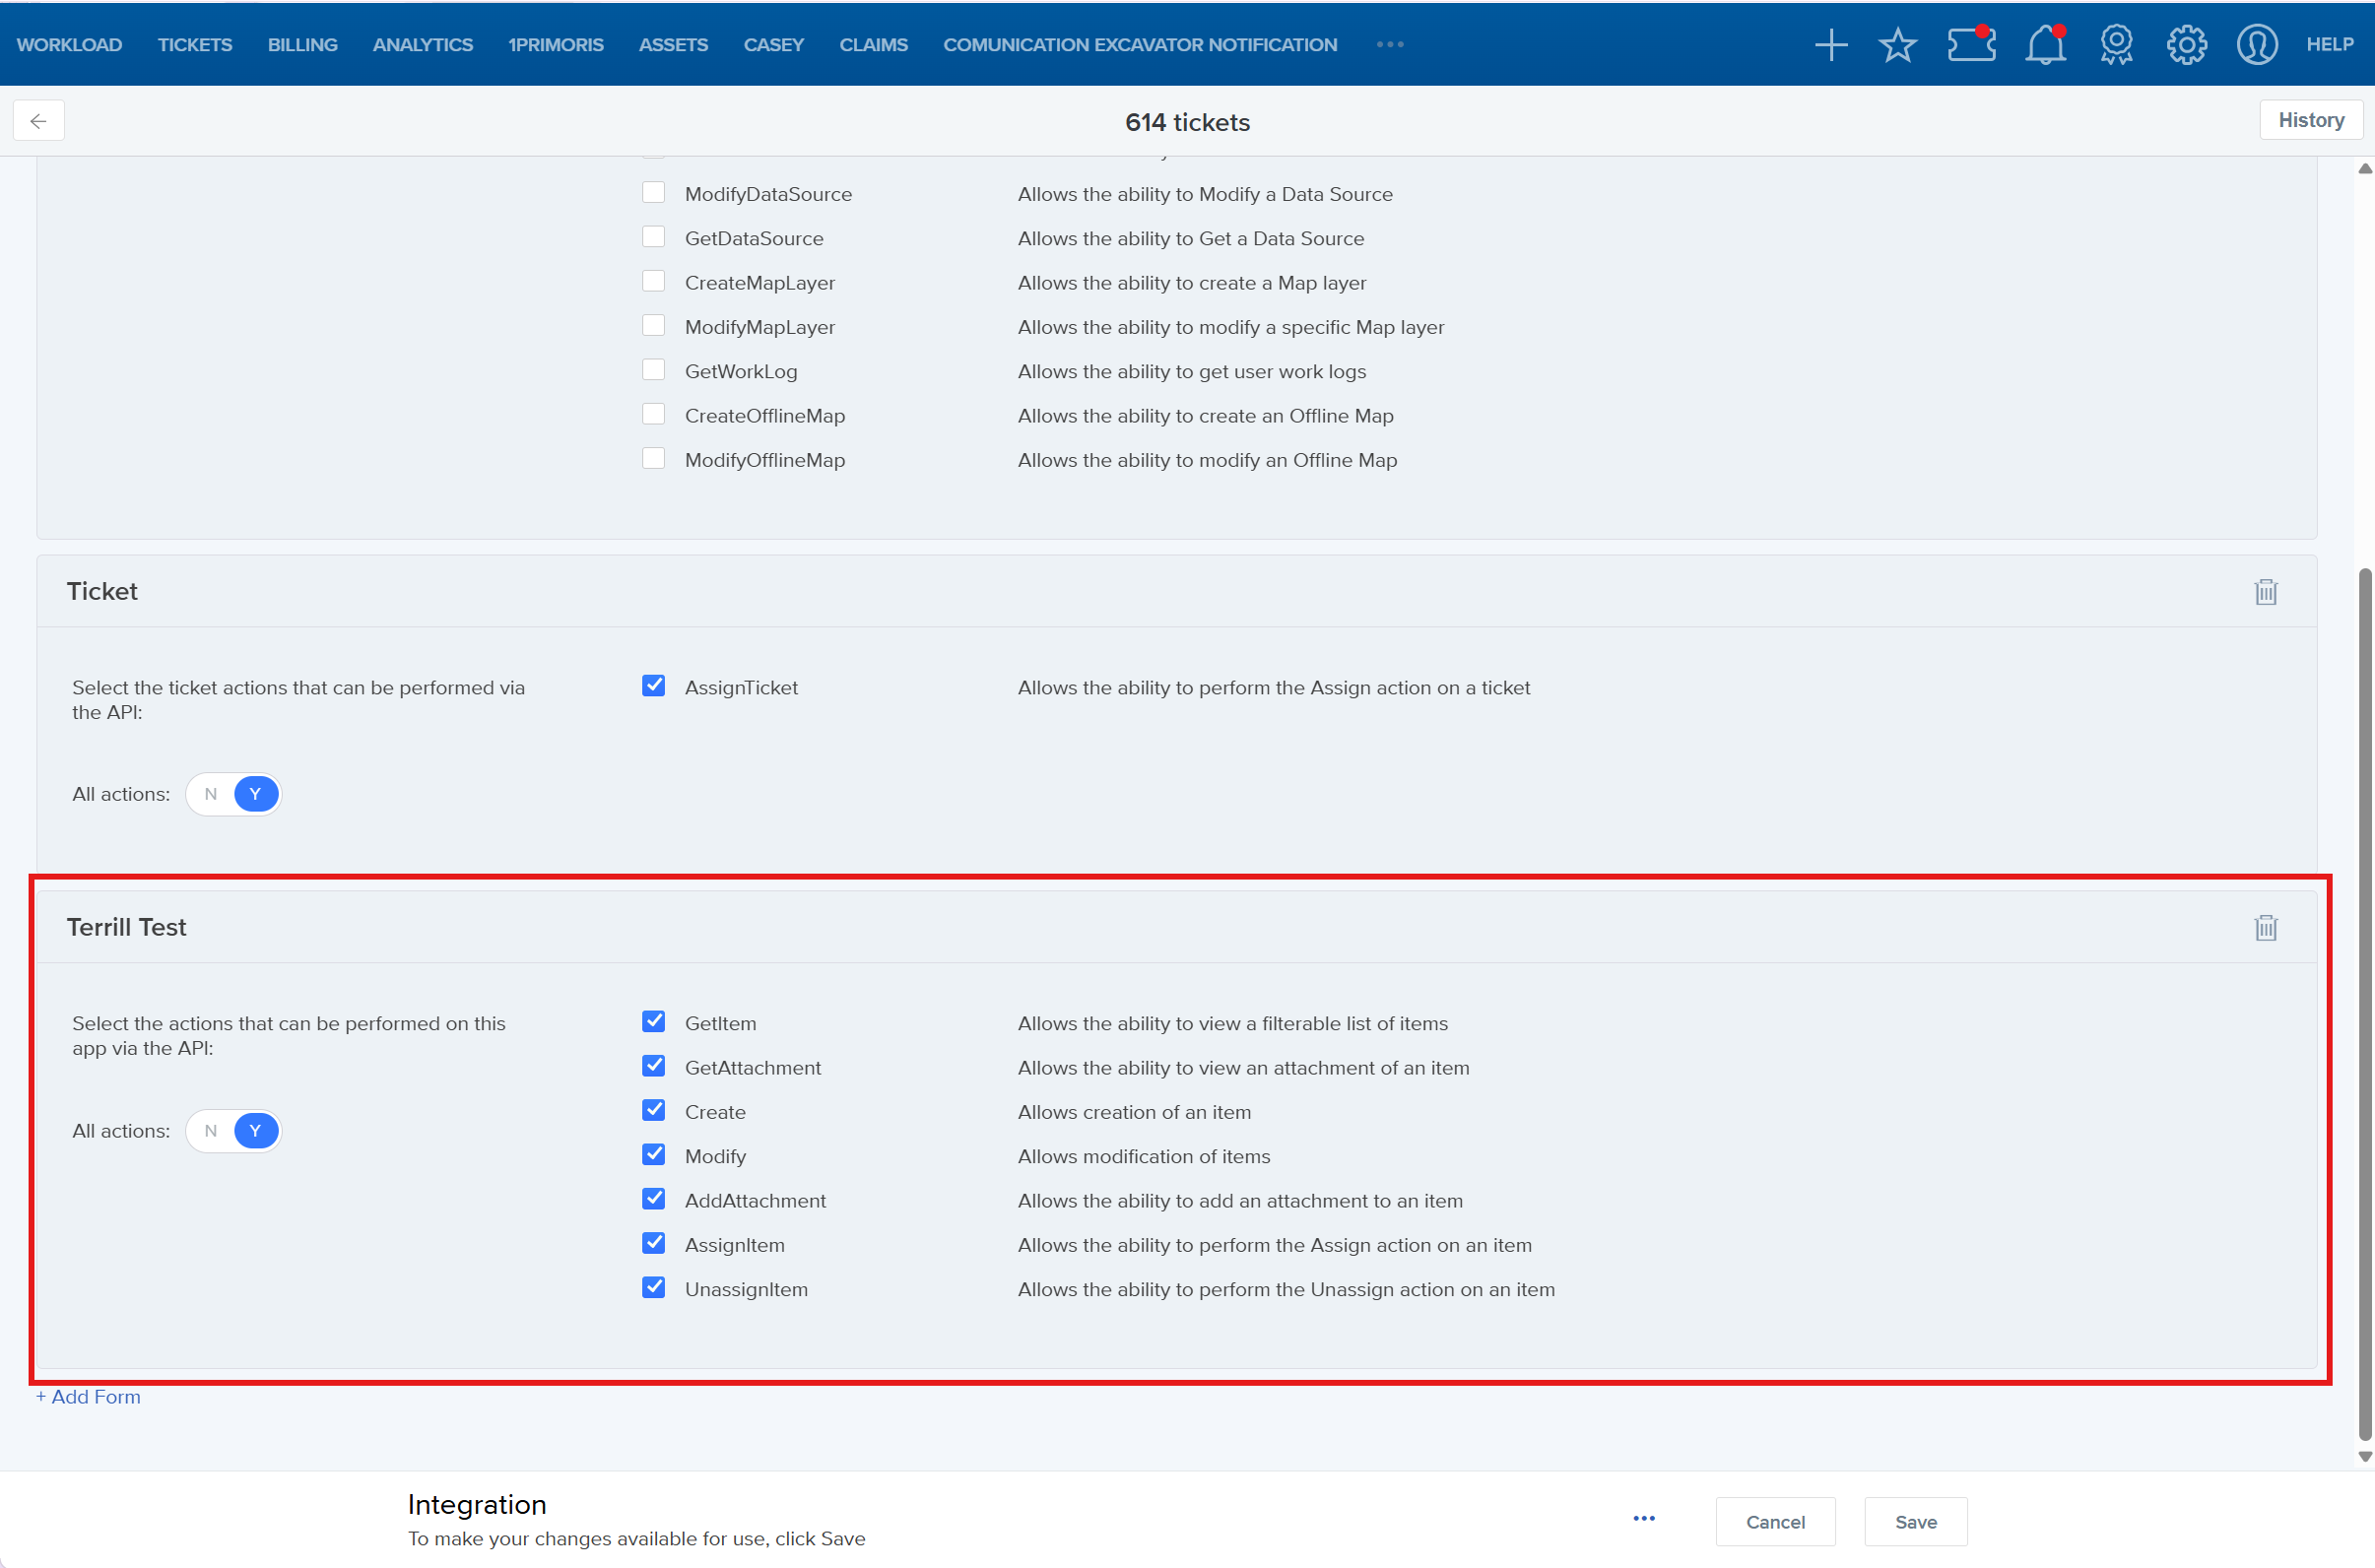
- Select Add Form. The form appears at the bottom of the Integration screen.
Configure Form Methods
The available methods can vary by form. All supported methods for a newly added form are enabled by default.
- Locate the form on the Integration screen.
- Review the available methods.
- Select or clear the applicable method checkboxes.
- Repeat these steps for any additional forms.
- Select Save.
Refer to the API documentation for details about each method.
Delete an Integration
- Open the integration you want to delete.
- In the lower-right corner, select the ellipsis (...) next to Cancel.
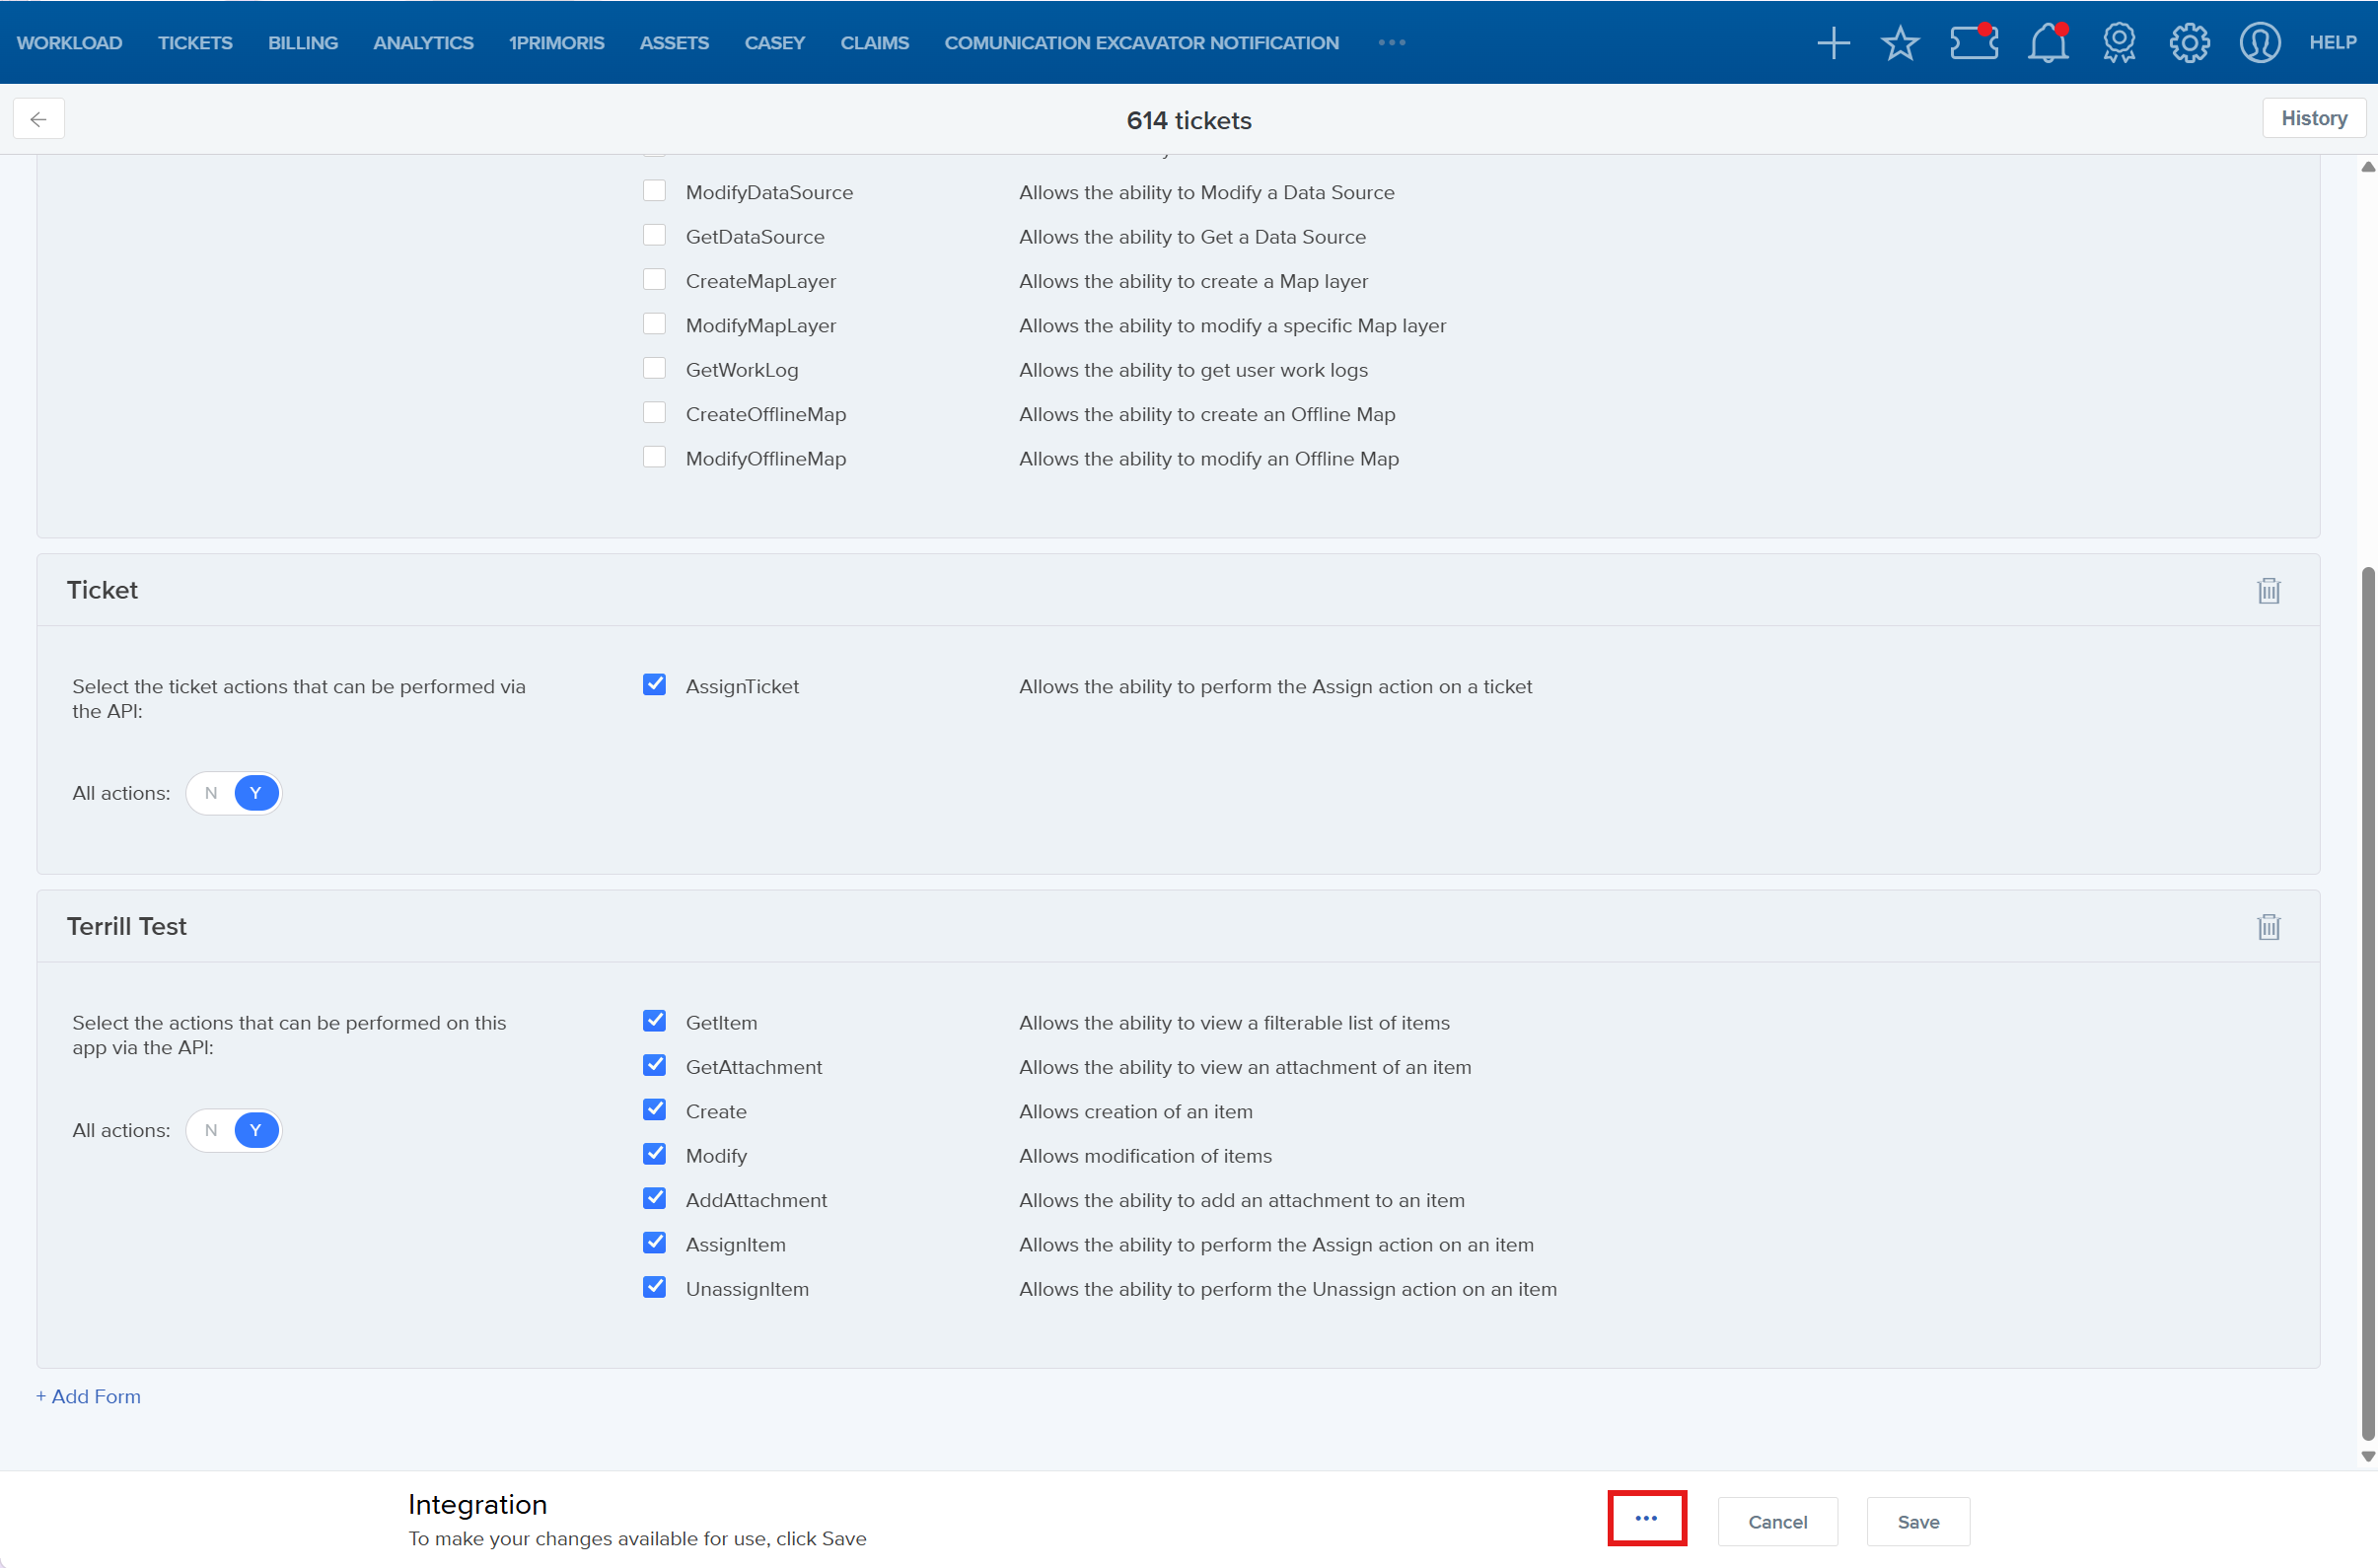
- Select Delete.

View the History of Changes
You can review integration history from either the Integration Summary screen or an individual Integration screen.
- In the upper-right corner, select History.

- Locate the change you want to review.
- Select Show Changes to view a description of the change.
The information displayed depends on where you open the history:
| Screen | History Information |
| Integration screen | Displays changes made to the selected integration and identifies the person who made each change. |
Integration Summary screen | Displays changes made to all integrations and identifies the people who made them. |
FAQ/Troubleshooting:
Q: What is an integration?
A: An integration is a real-time connection between an external application and an Irth system. It uses an API key and selected methods to exchange data.
Q: Where can I find the API key?
A: Open the integration from the Integration Summary screen. The API key appears in the General section of the Integration screen.
Q: What happens if I reset the API key?
A: The system generates a new API key, and the previous key will no longer work. You must update the connected application or form with the new key to restore the integration.
Q: Why did my integration stop working after I reset the API key?
A: The connected application or form may still be using the previous API key. Replace it with the newly generated key.
Q: Are all methods enabled automatically?
A: Yes. All available general and form-specific methods are enabled by default. You can clear the checkboxes for methods that should not be available.
Q: Why do different forms have different methods?
A: Available methods depend on the selected form and its supported actions. Refer to the API documentation for details about each method.
Q: Can I use one integration with multiple forms?
A: Yes. Select + Add Form to associate additional forms with the integration. You can configure the available methods separately for each form.
Q: Where can I see who changed an integration?
A: Select History from the Integration screen to review changes to that integration. To review changes across all integrations, select History from the Integration Summary screen.
Q: Can I upload Excel or CSV data through Integration Configuration?
A: Integration Configuration is used to manage real-time API connections. To manually load data from a Microsoft Excel or CSV file, use the Data Sources feature.
Q: How can I receive notifications about API errors?
A: Configure Alert Notifications for supported API methods. See the related Alert Notifications article for setup instructions.
Questions? Contact us!

Was this article helpful?
That’s Great!
Thank you for your feedback
Sorry! We couldn't be helpful
Thank you for your feedback
Feedback sent
We appreciate your effort and will try to fix the article